
Find a file and label (tag) it in a few minutes.
The first time Attachment Manager opens after it is installed, it shows Setting up Attachment Manager while it reads your projects. Large sites take longer. You can leave the page and come back.
1. Open Attachment Manager
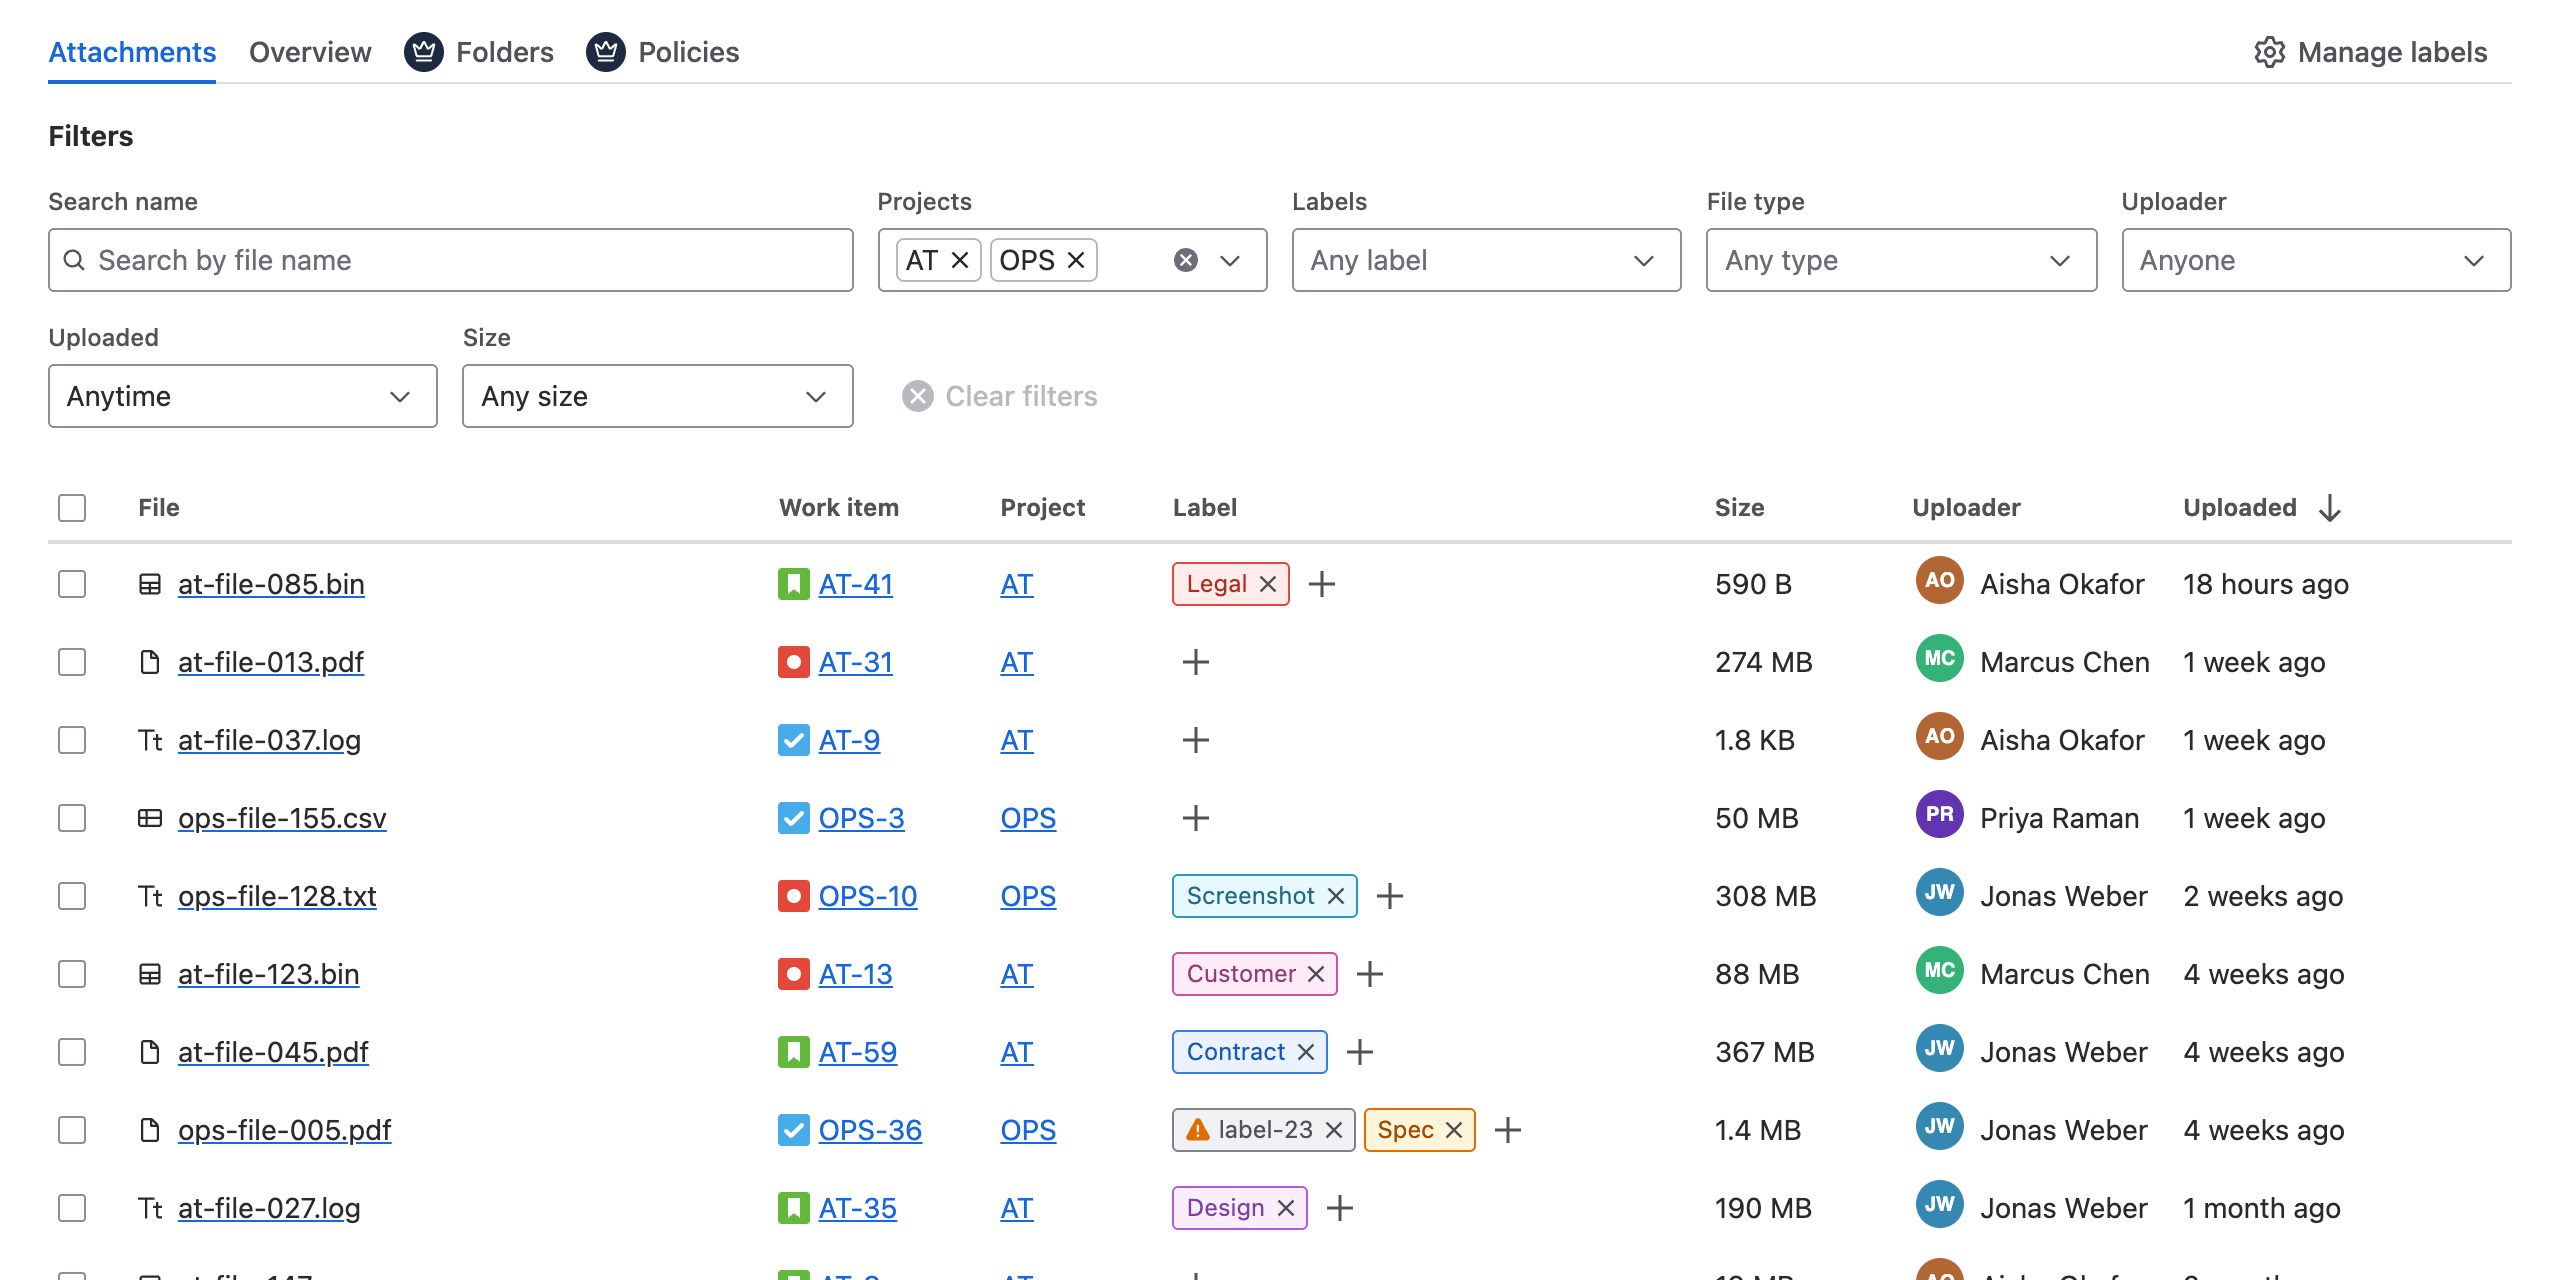
In the menu at the top of Jira, select Apps → Attachment Manager. The app opens on the Attachments tab, which lists the files attached to work items in your projects.
2. Find a file
Type part of a file name in Search name, or narrow the list with Projects, Labels, File type, Uploader, Uploaded or Size.
3. Label it
-
Select + in the file's Label column.
-
Tick a label.
-
Select Apply. The label appears beside the file.
No labels yet? See Create attachment labels.
4. Explore the app
-
Overview shows how much storage your attachments use and where. See Overview and storage reporting.
-
Folders (Advanced edition) collect files from many work items in one place. See Folders and sharing.
-
On any work item, the Attachments panel lists its files with their labels. See View attachments on a work item.
If no files appear
A Jira administrator chooses which projects the app shows (tracked projects). Your project may not be tracked yet, or the app may still be reading it. See FAQ and troubleshooting.