Logging Time
Method 1: From Calendar/List View
-
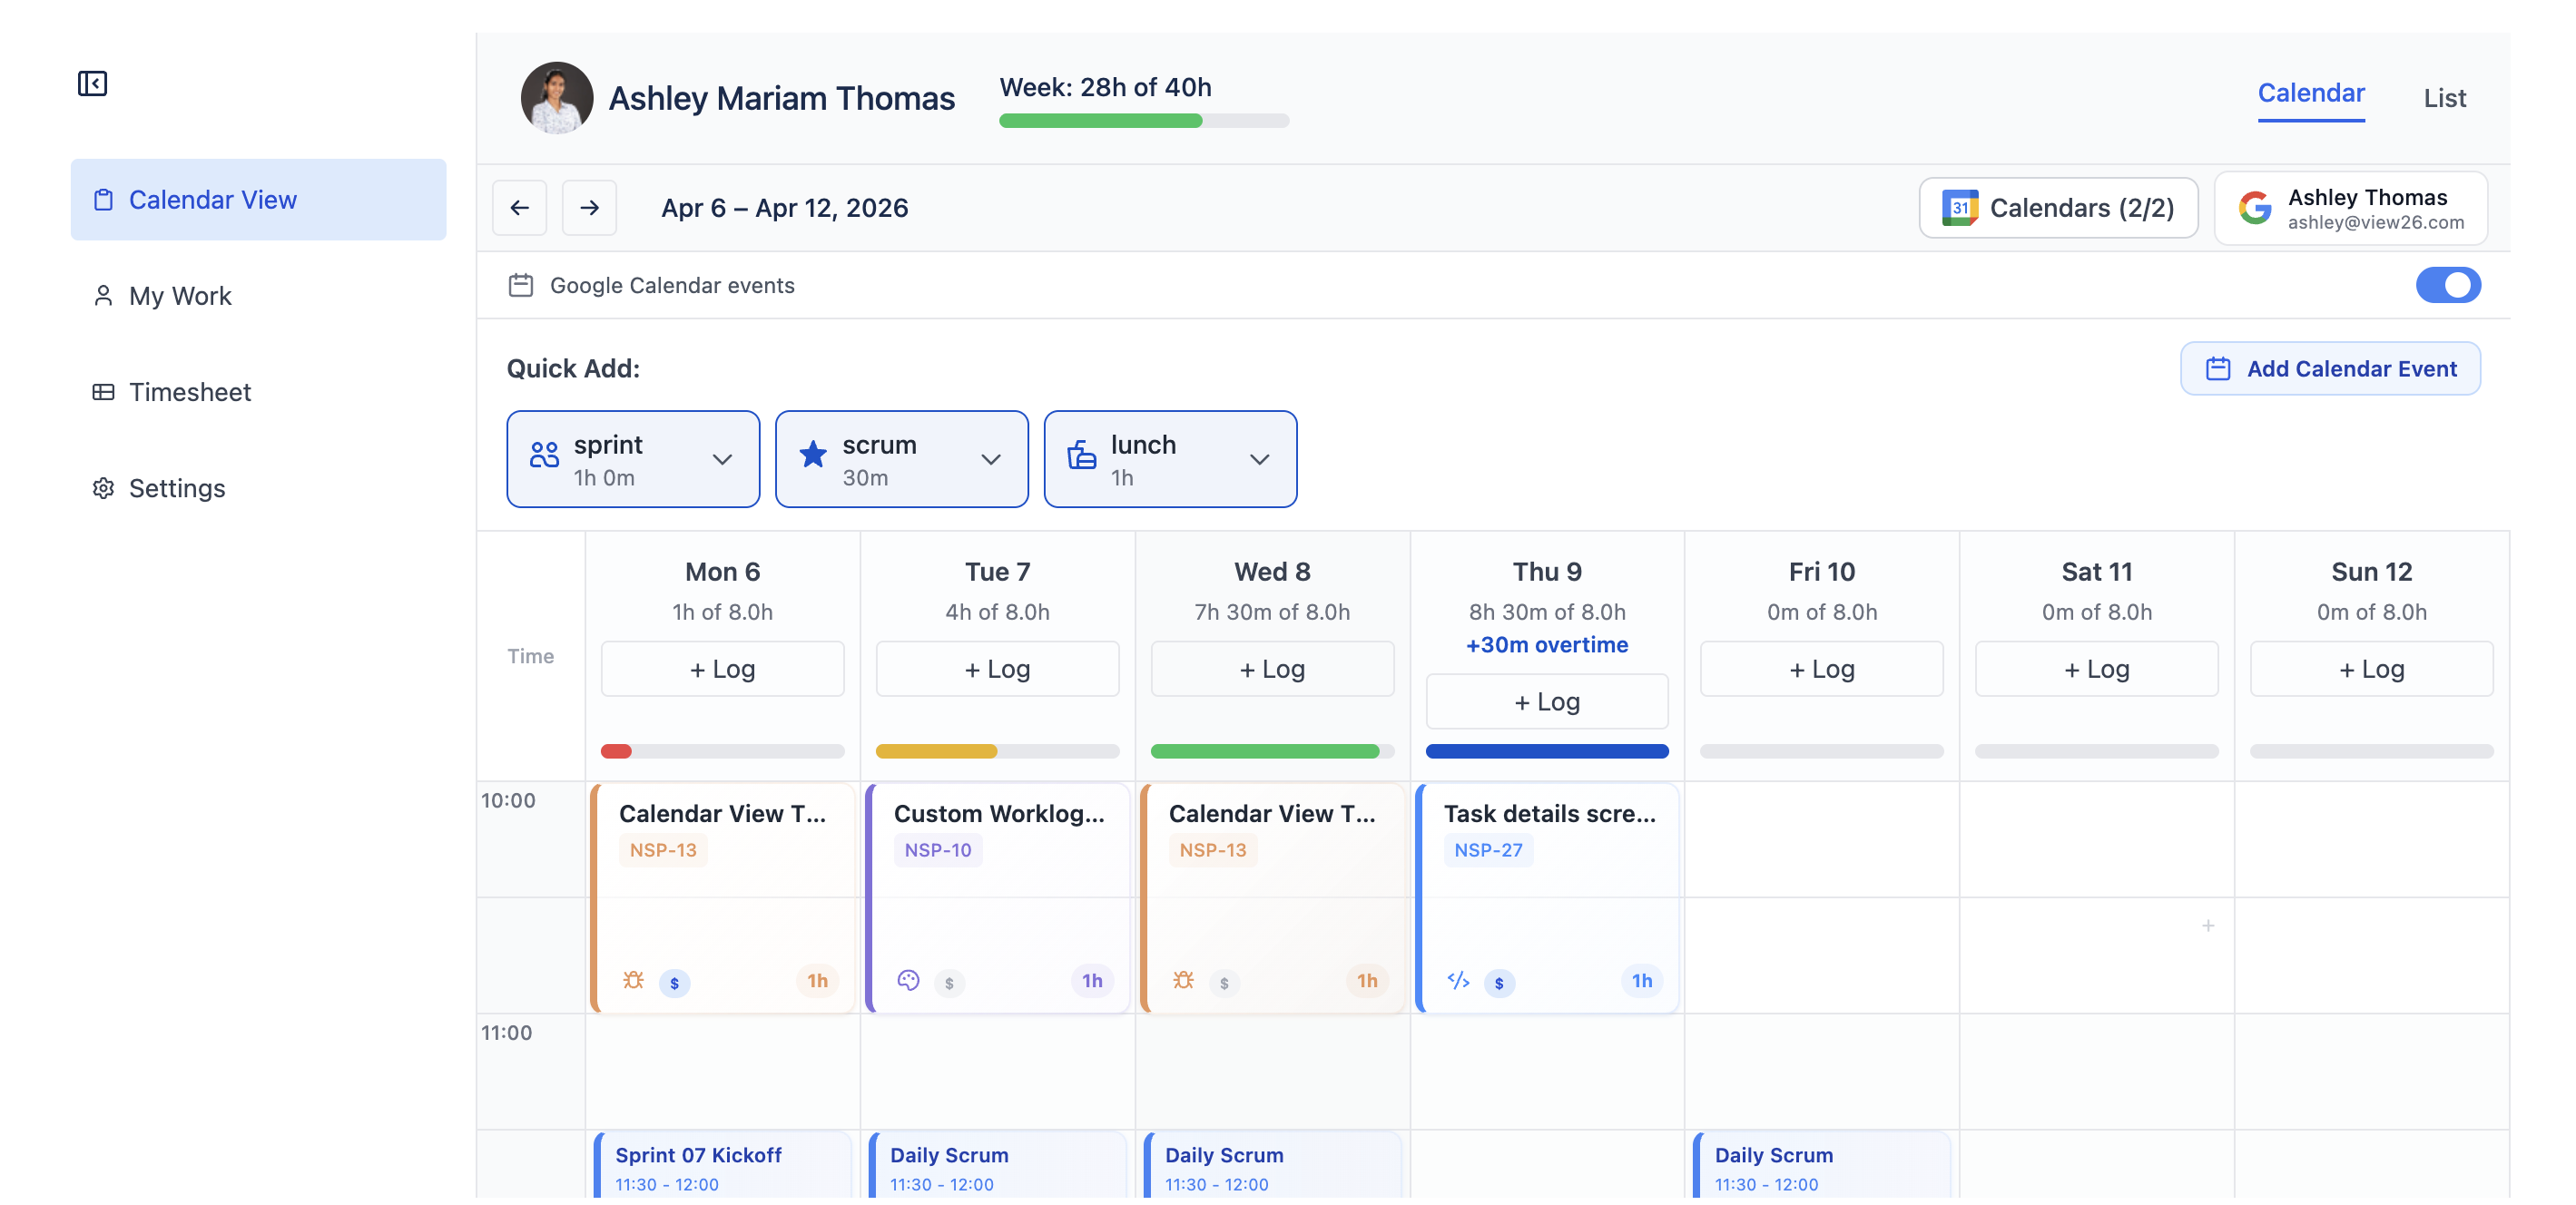
Navigate to Calendar View from the sidebar
-
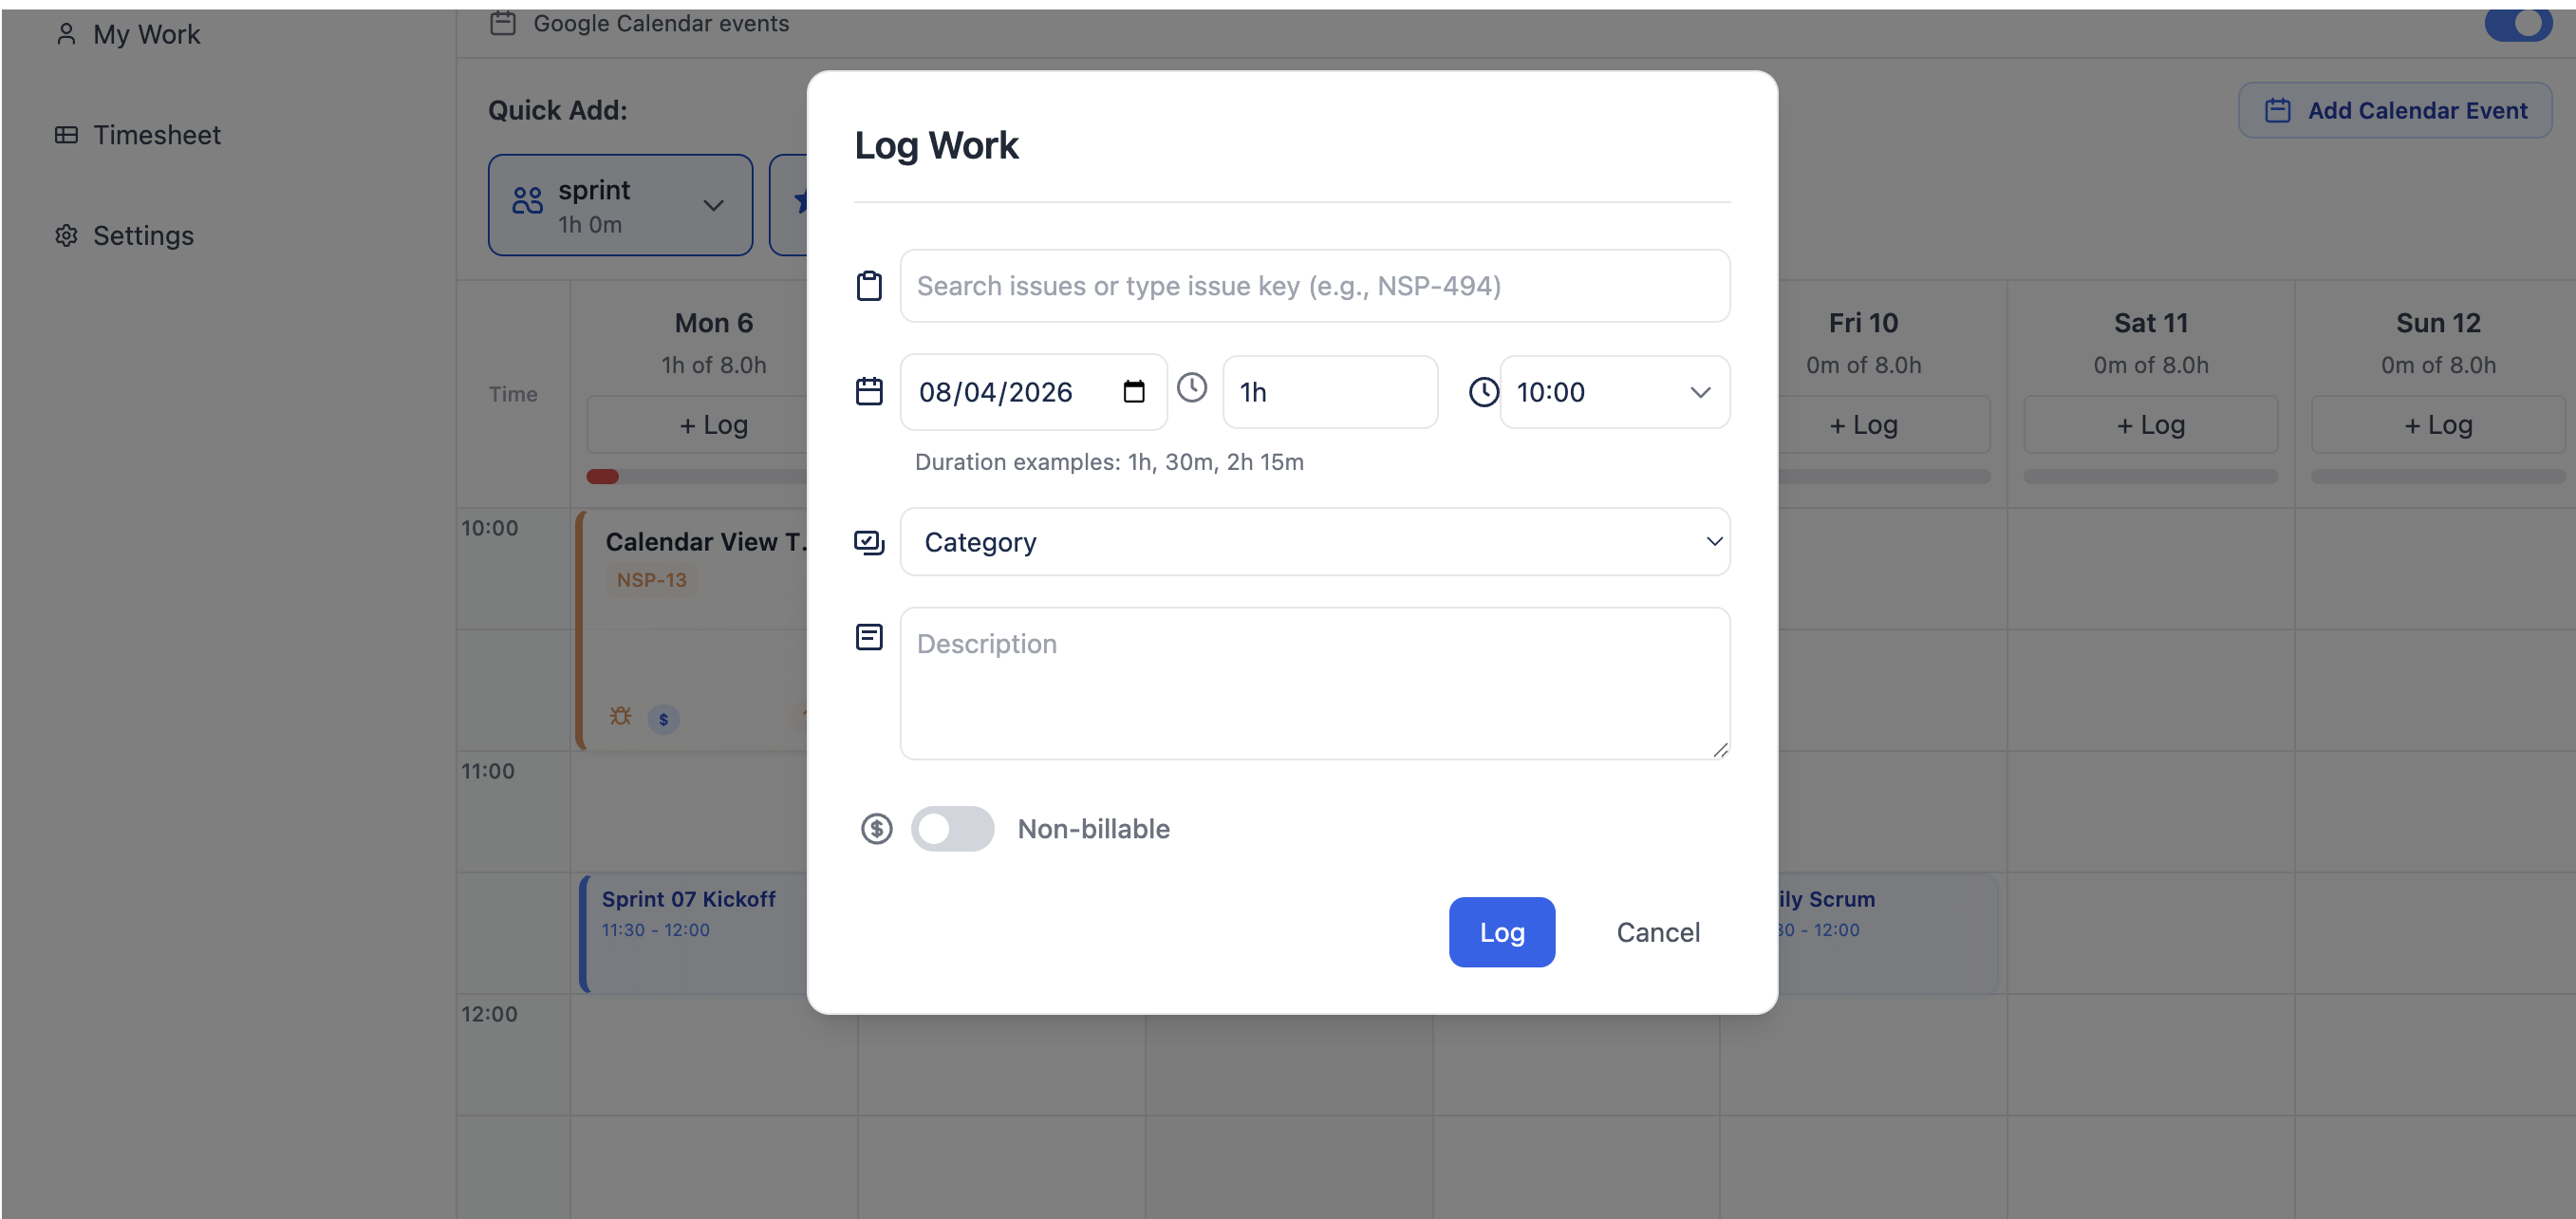
Click on any time slot or on + Log button for the desired date and time
-
The Log Work Form opens with pre-filled date and time
-
Complete the form fields
-
Click Log to save
Method 2: From Dashboard
-
Go to Dashboard
-
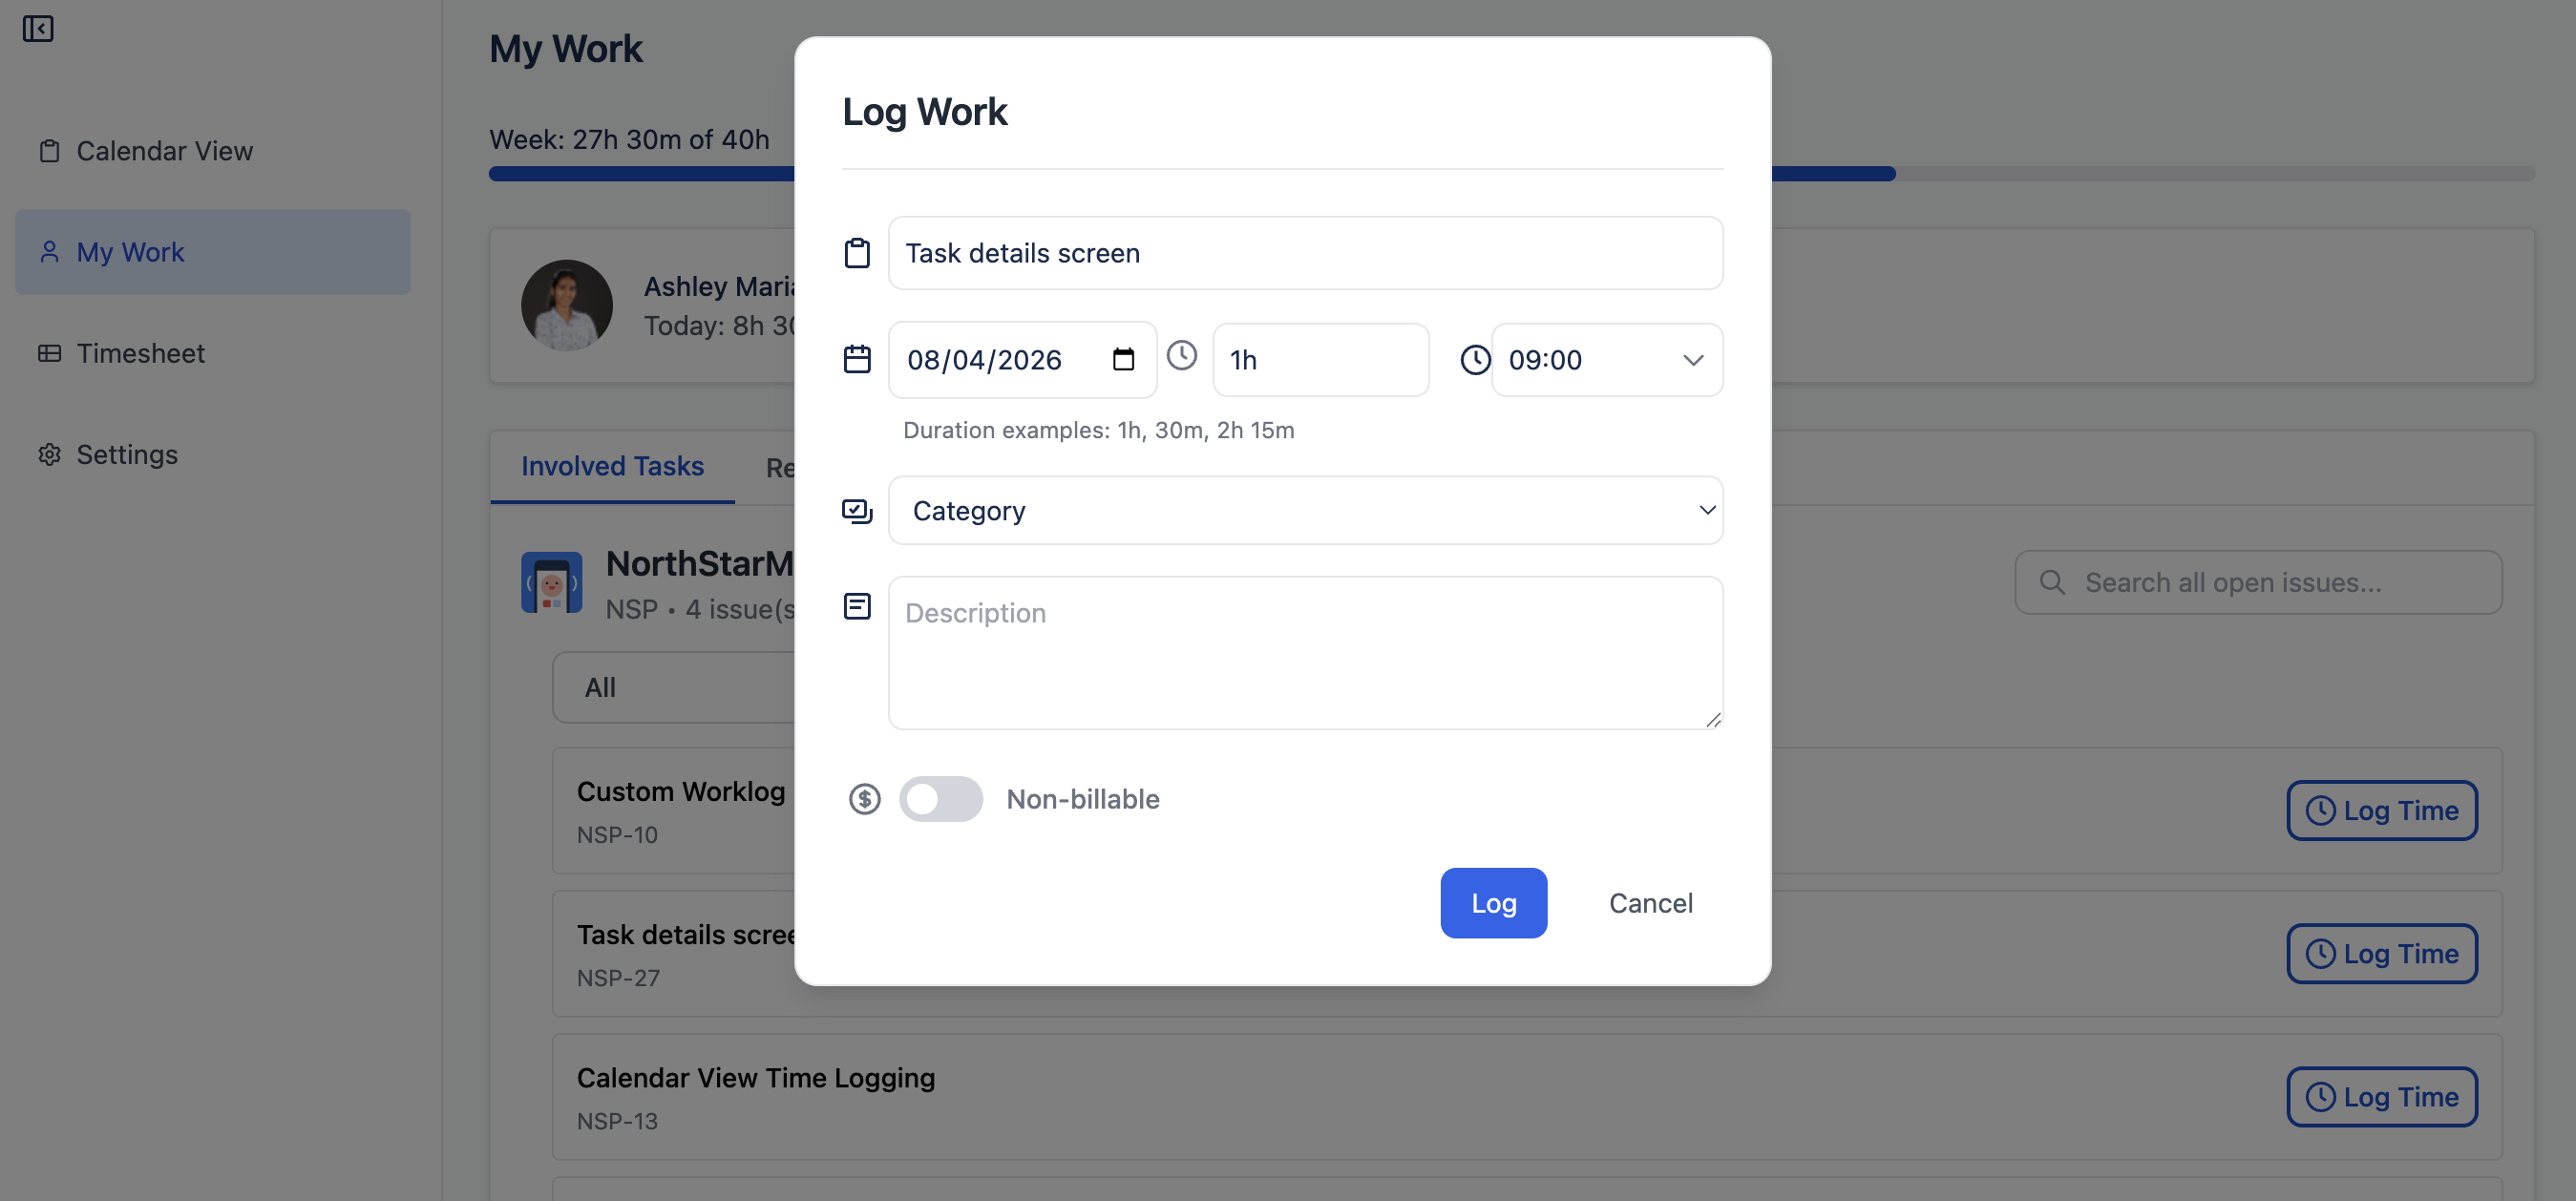
Find the issue in Assigned Issues or Recent Issues
-
Click on the issue
-
The Log Work Form opens with the issue pre-selected
-
Click Log to save
Managing logged issues
Editing Worklogs
-
Click on any worklog card in Calendar or List view
-
Click the Edit icon
-
The Log Work Form opens with current values
-
Click Update to save changes
-
Changes sync to both the app and Jira
Deleting Worklogs
-
Click on the worklog card
-
Click the Delete icon
-
Confirm deletion
Duplicating Worklogs
Calendar View supports quick duplication:
Duplicate Below (Column duplication):
-
Right-click or use duplicate button on a worklog
-
Select "Duplicate Below"
-
Creates identical entry immediately after the current one on the same day
Duplicate Right (Row duplication):
-
Select "Duplicate Right"
-
Creates identical entry the next day at the same time
Log Card Features
-
Drag and Drop: Move worklogs to different times
-
Resize: Drag the bottom edge to adjust duration (30-min snap)
-
Color Coding: Different colors per category
-
Hover Actions: Actions appear on hover
Dashboard Features
Overview
The Dashboard provides an at-a-glance summary of your work activity, quick access to issues, and shortcuts for logging time.
1. Weekly Overview
-
Week Total: Sum of hours for current week (Monday-Sunday)
-
Progress Bar: Visual indicator toward 40-hour week
-
User Info: Your name header
-
Today's Hours: Total hours logged today
-
Real-time Updates: Updates as you log work
2. Assigned Issues
Shows all Jira issues currently assigned to you:
-
Issue Key: Clickable link to navigate to Jira
-
Quick Log: Click any issue to open Log Work Form with issue pre-selected
3. Recent Issues
Displays issues updated recently:
-
Recently Updated: Issues with recent activity
-
Quick Access: Click to log time
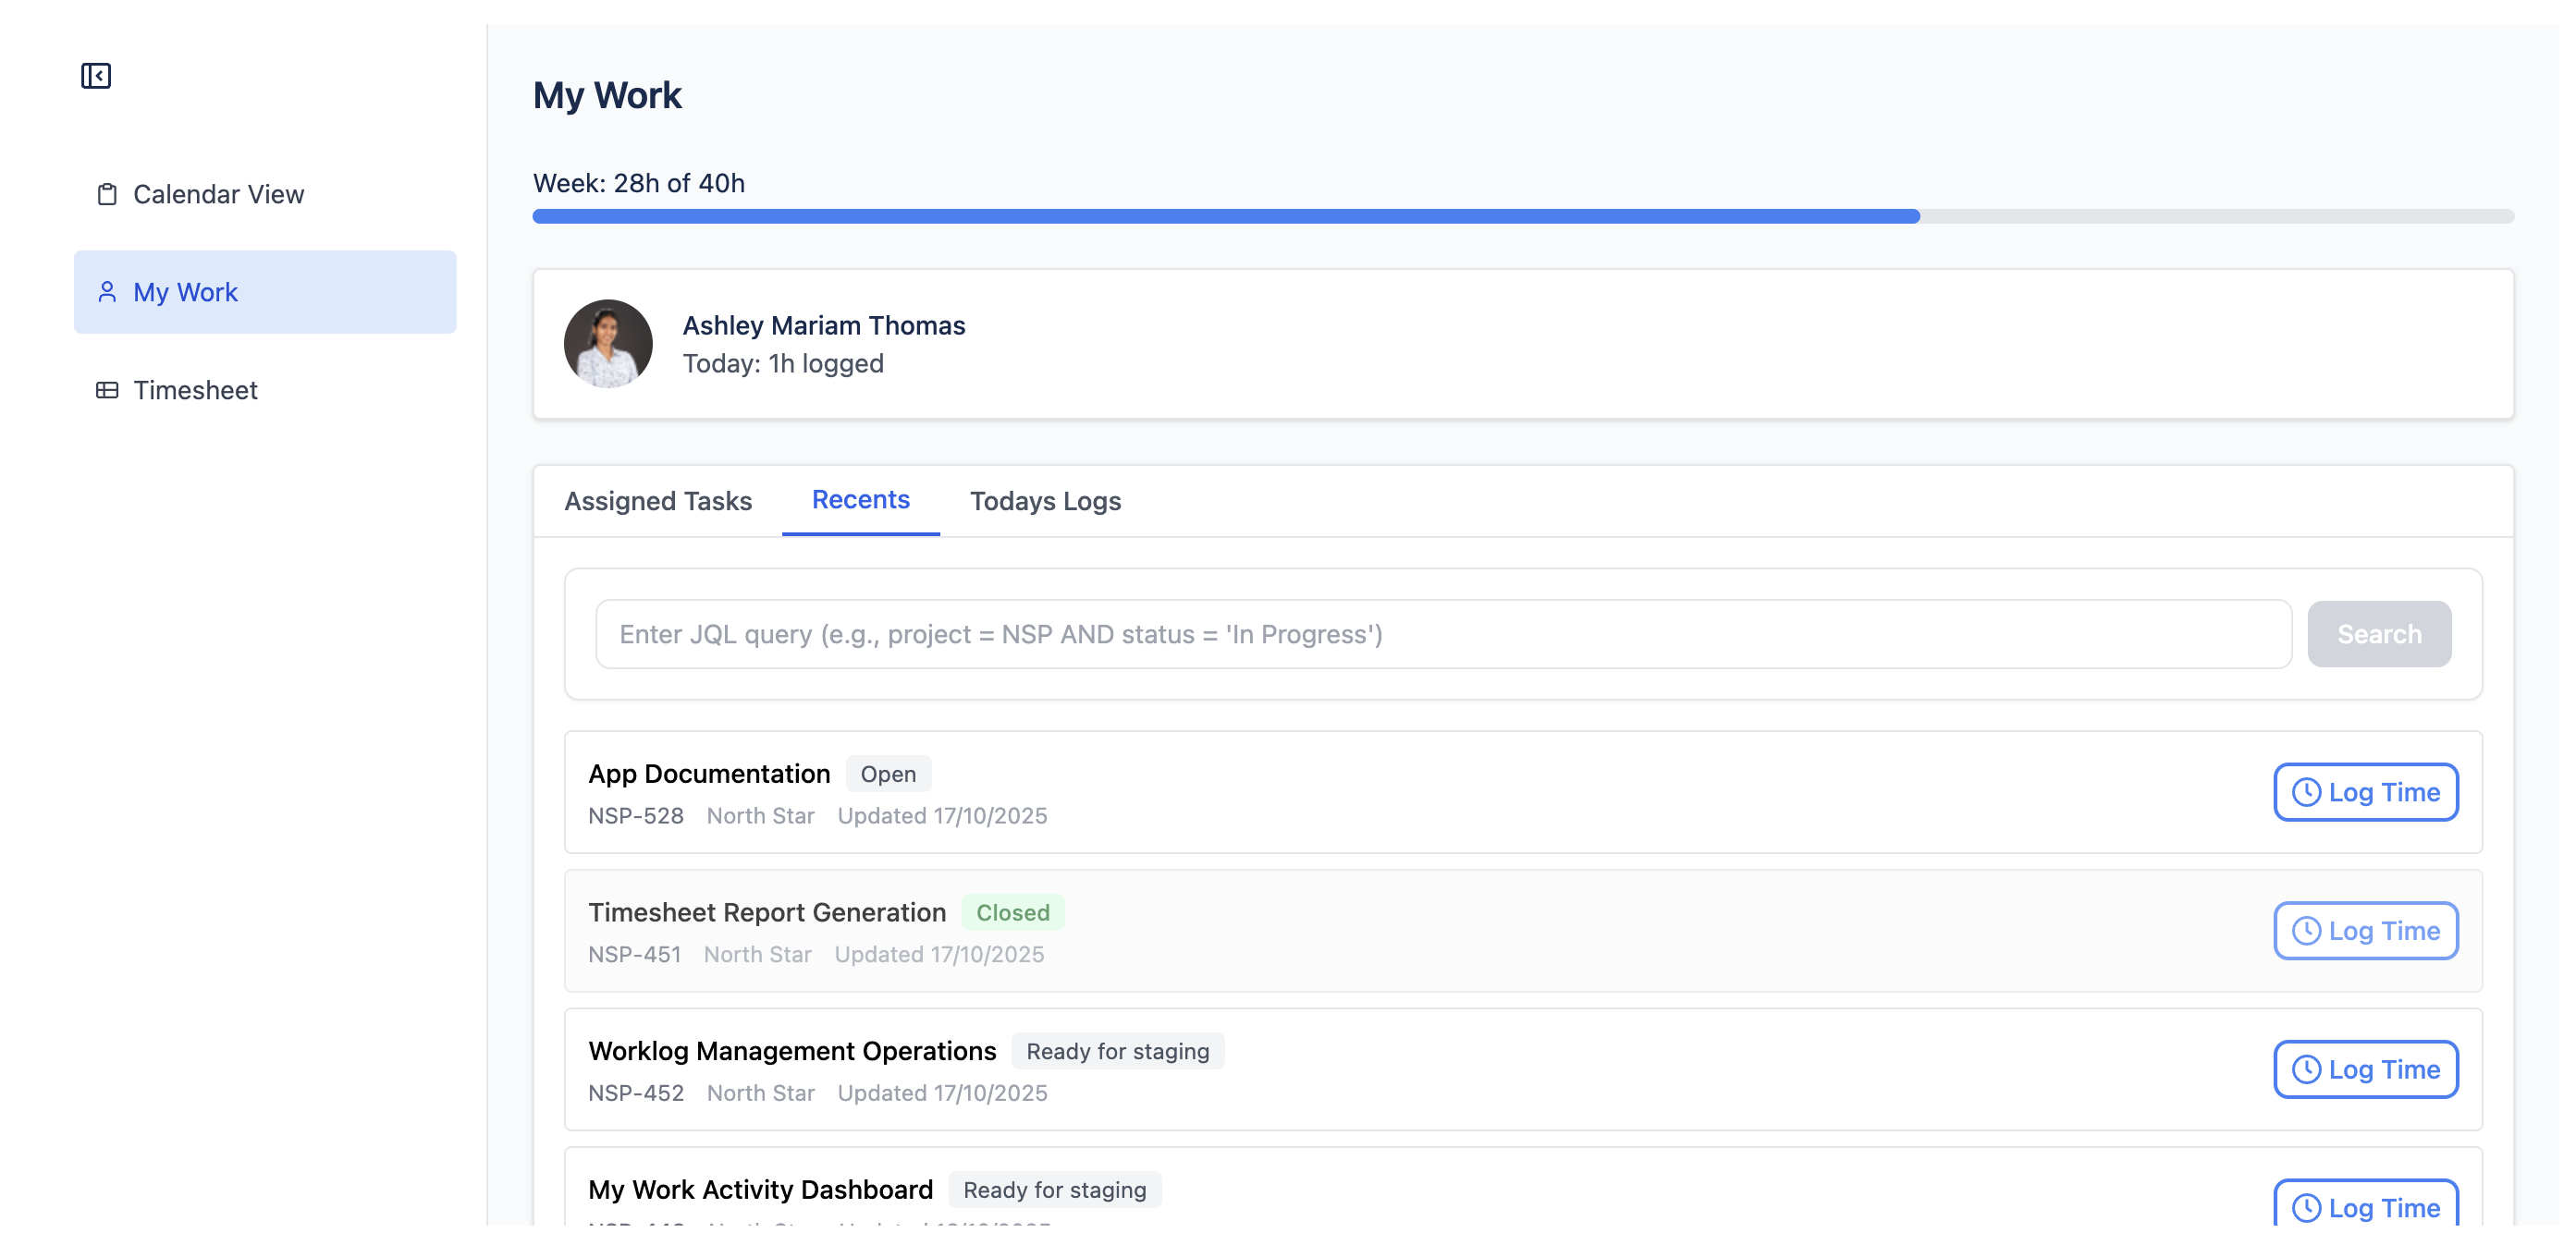
Custom JQL Search
Advanced search using Jira Query Language in “Recents” tab:
Example JQL Queries:
project = MYPROJ AND status = "Open" AND
assignee = currentUser() AND updated >= -7d
How to Use:
-
Enter JQL query in the search box
-
Press Enter or click Search
-
Results display below with issue keys and summaries
-
Click any result to log work
Dashboard Best Practices
-
Start of Day: Check assigned issues to plan your day
-
End of Day: Verify you've logged all work in Today's Logs
-
Weekly Check-in: Review weekly total
-
Quick Logging: Use Recent Issues for follow-up work on same issues
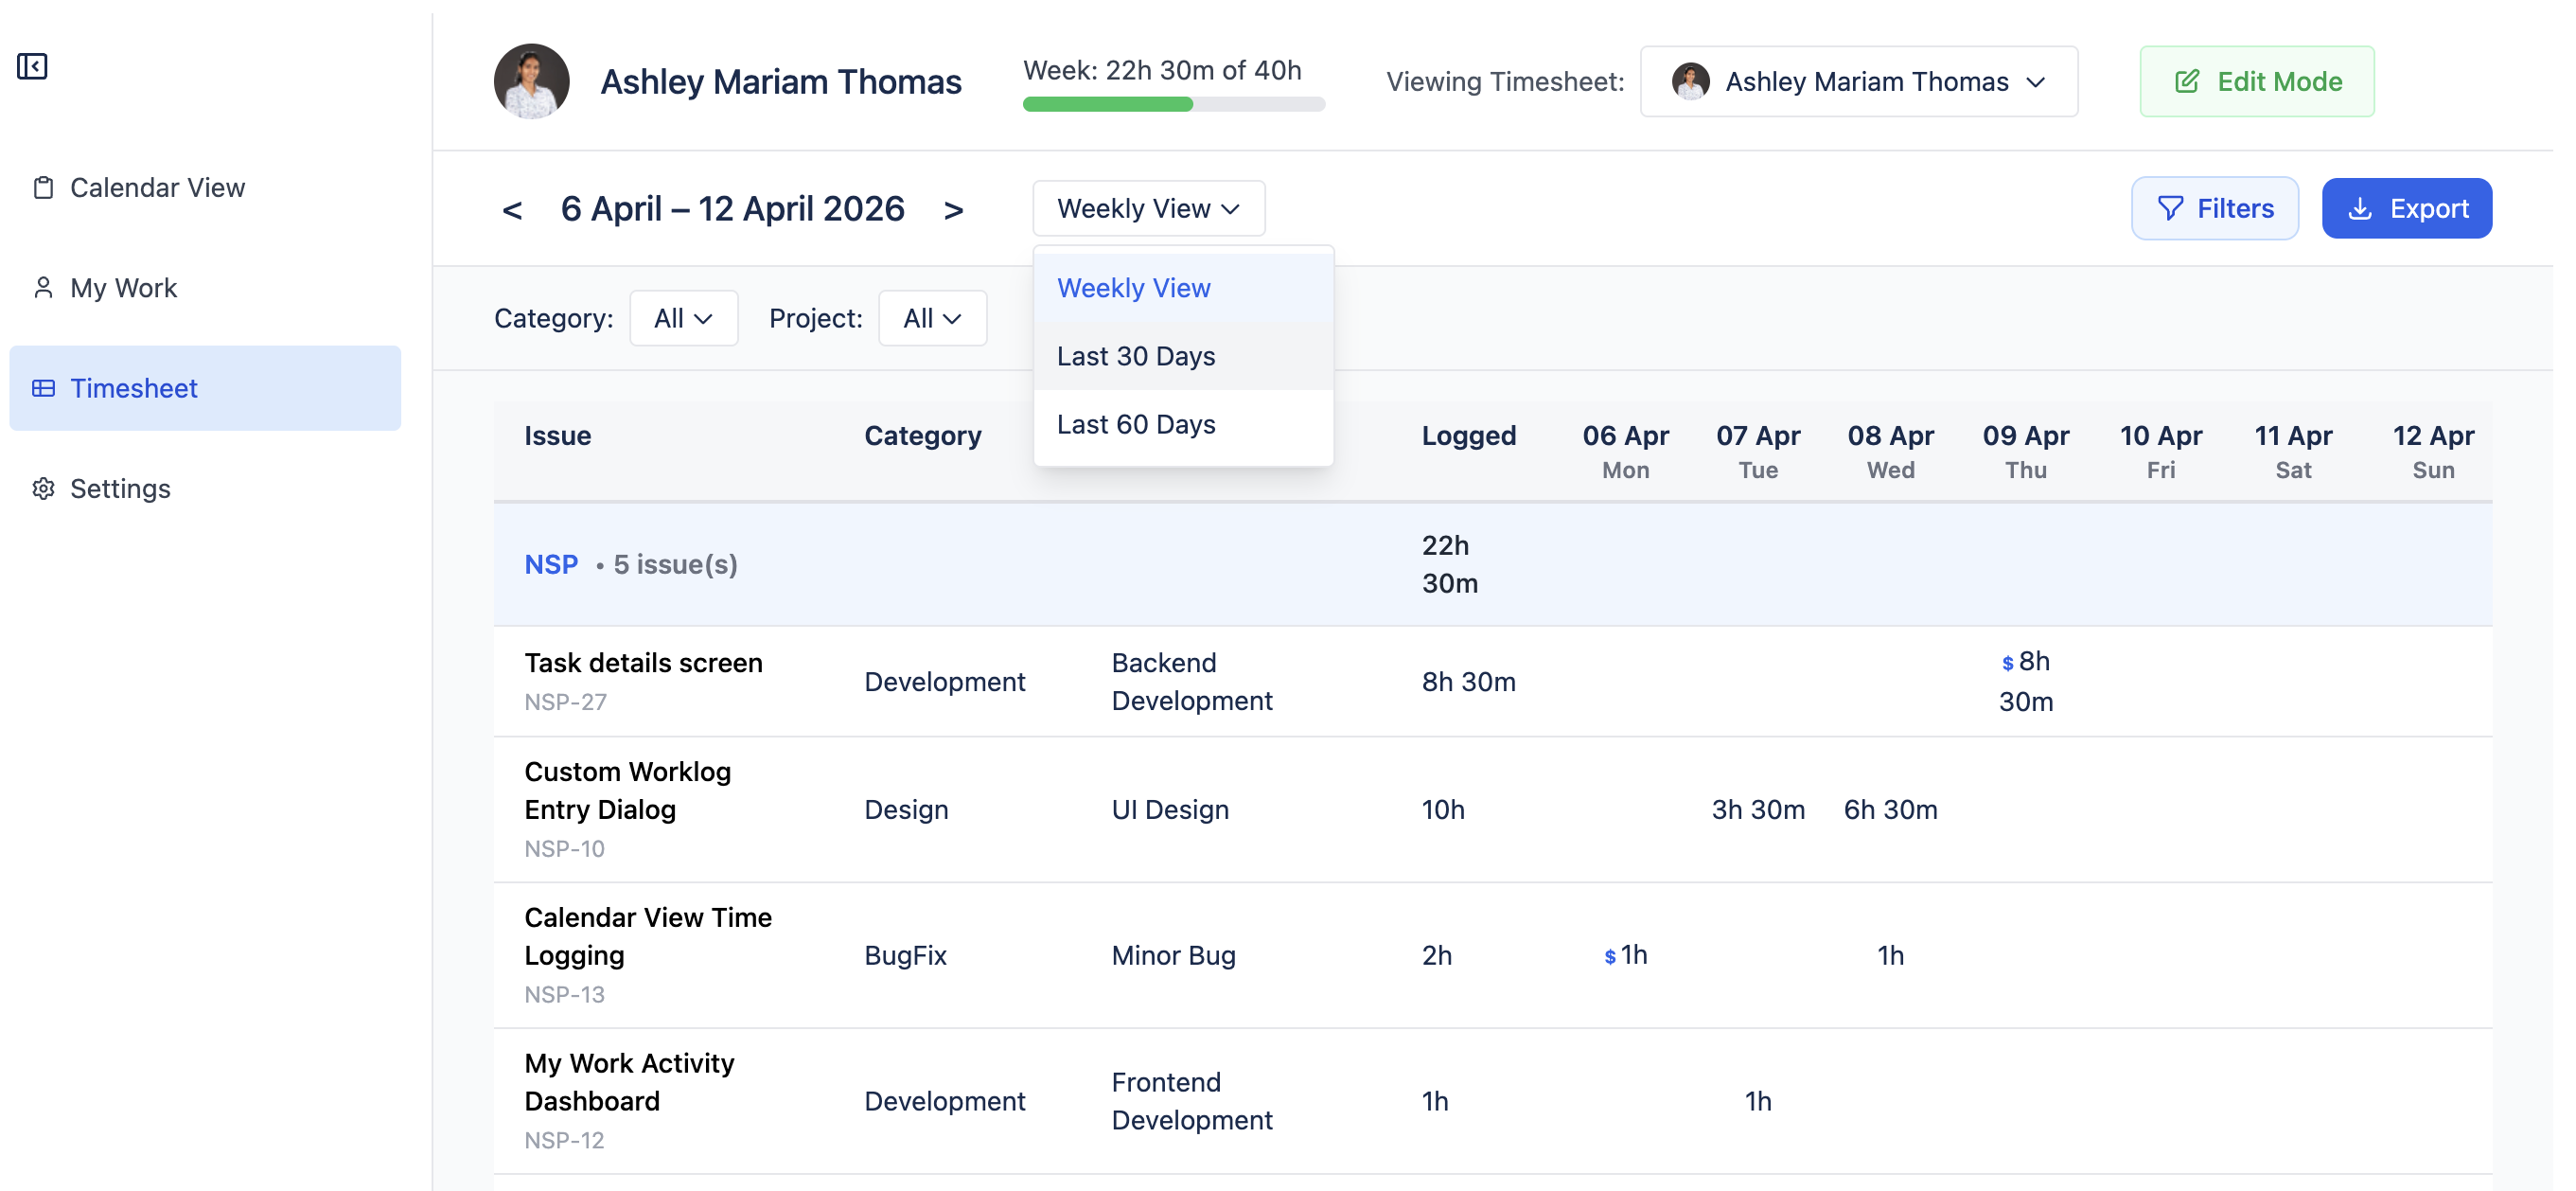
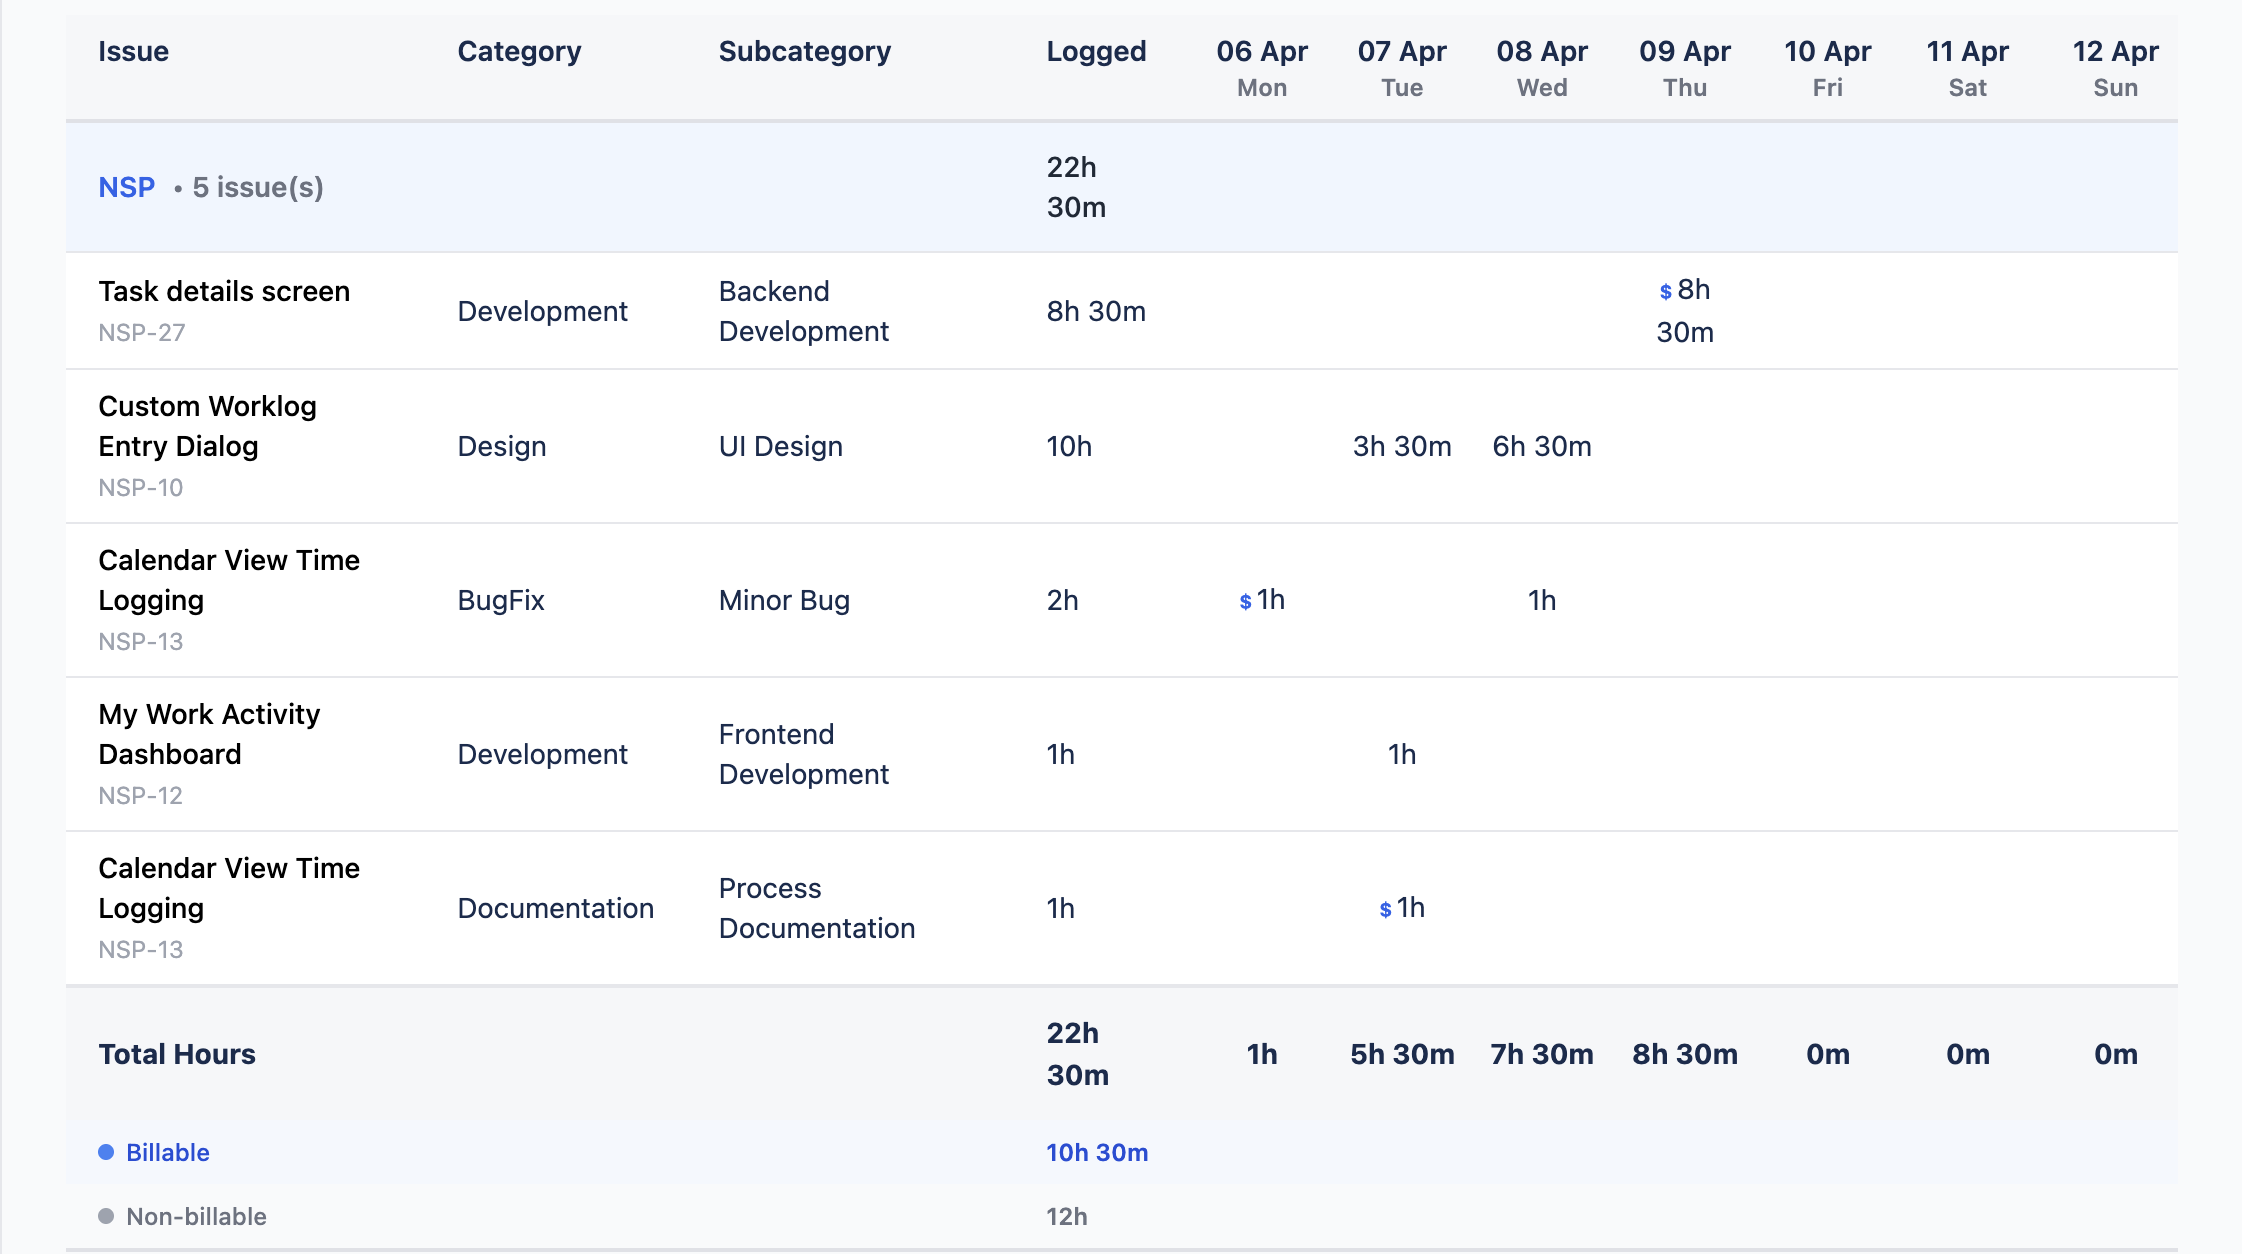
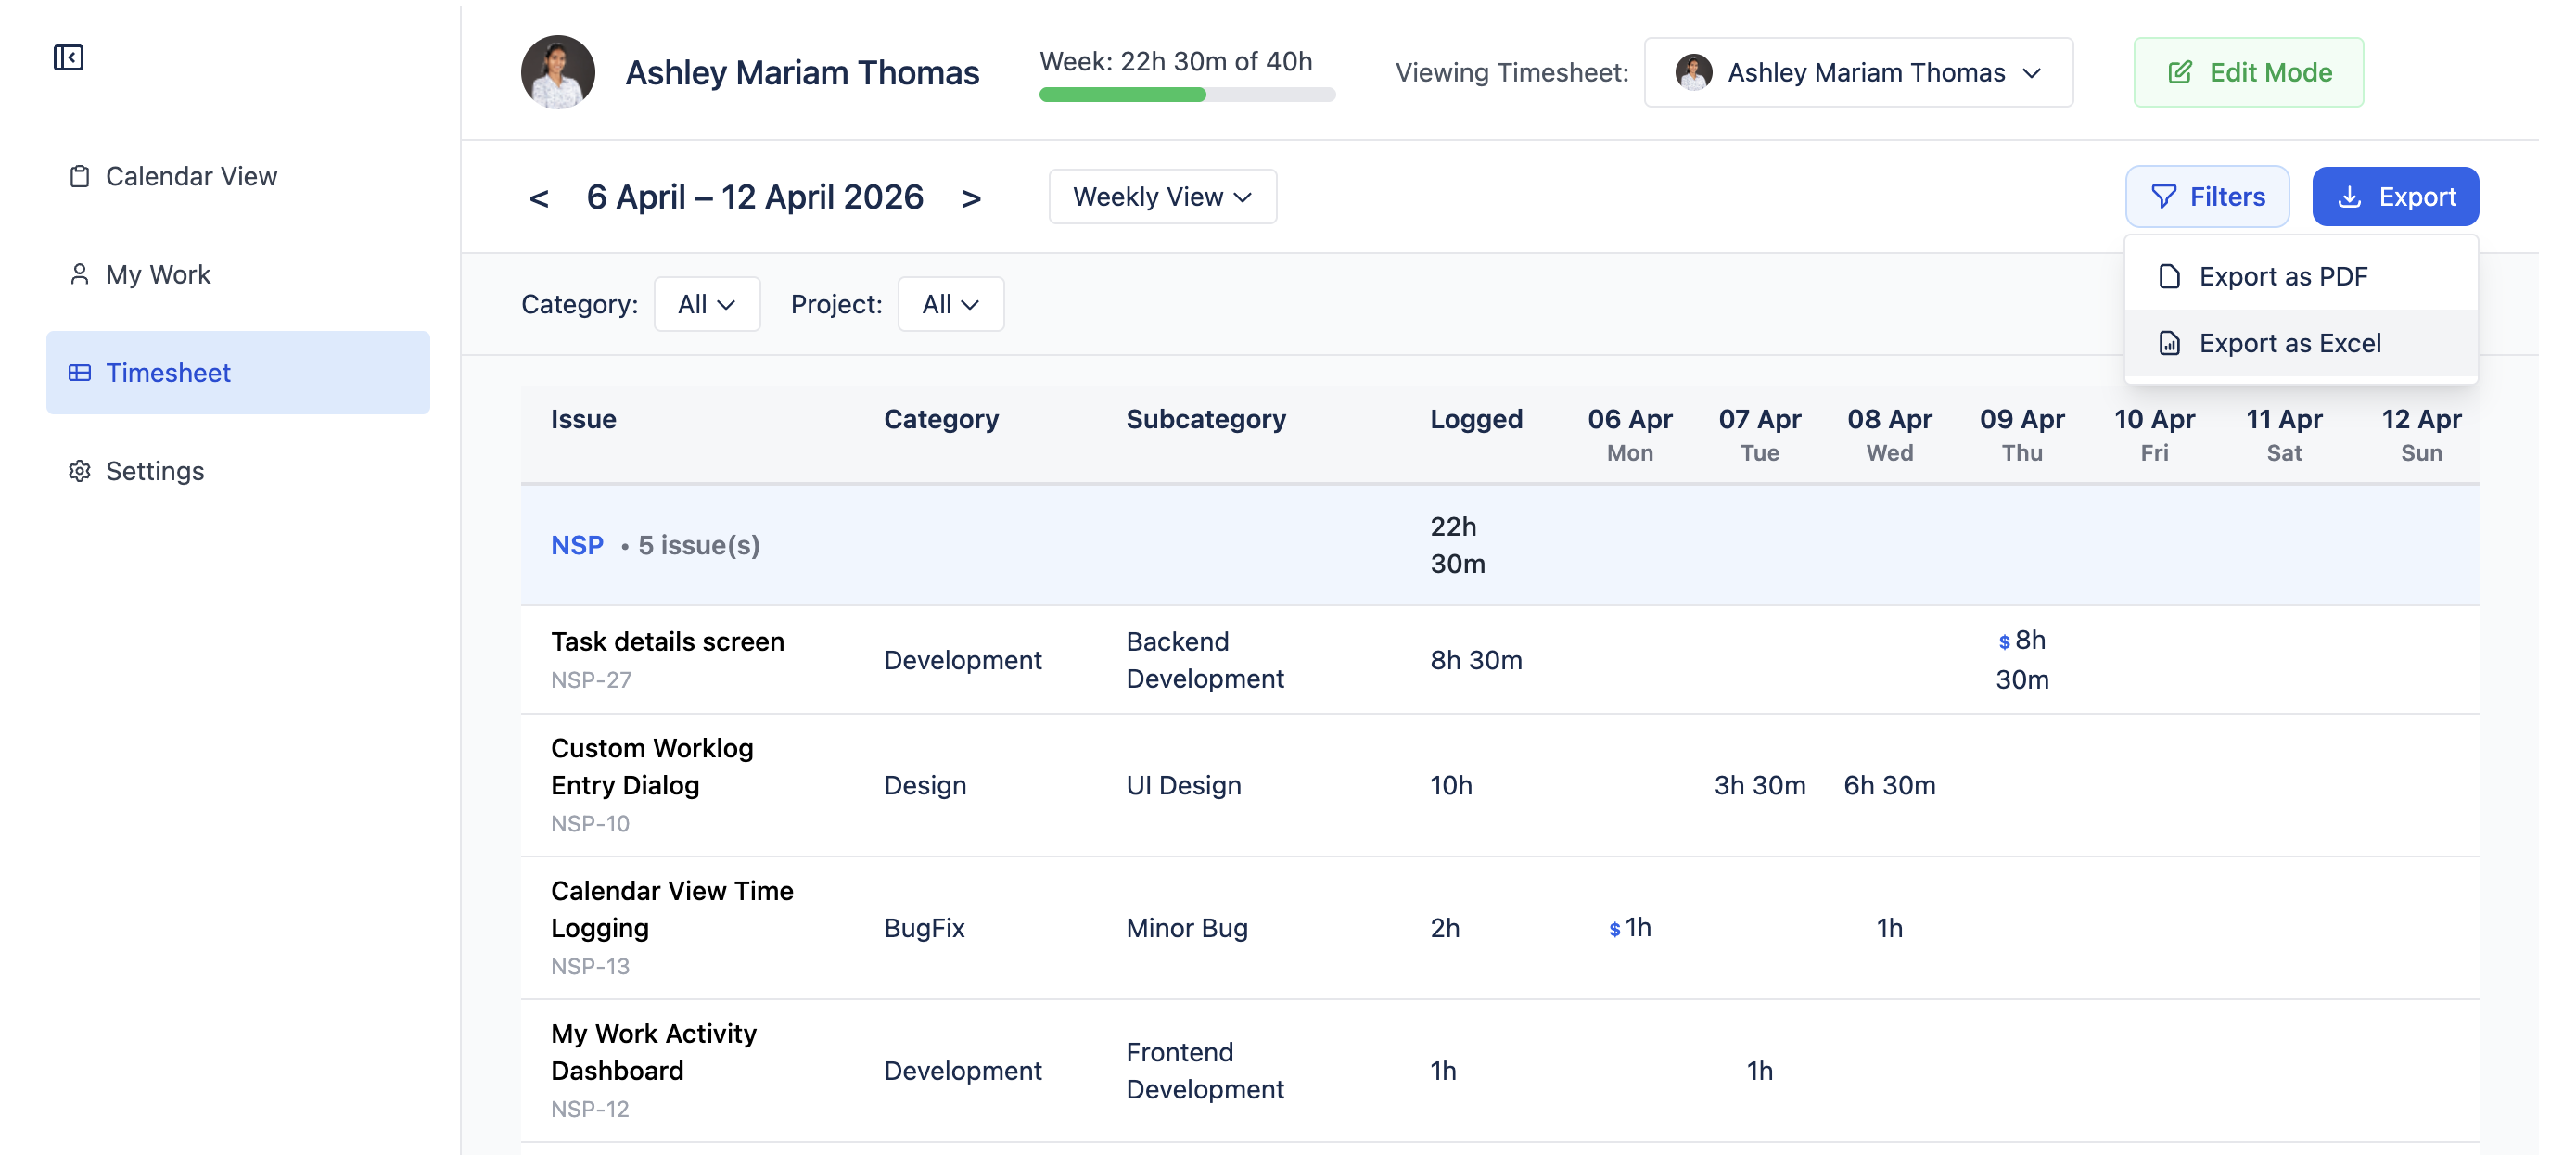
Timesheet View
Overview
The Timesheet View presents your work in a traditional timesheet table format, organized by date columns and task rows. It supports filtering and multiple date range views.
Timesheet Layouts
Weekly View (Default)
-
Columns: Monday through Sunday
-
Rows: Grouped by Project → Issue → Category/Subcategory
-
Totals: Daily and weekly totals calculated automatically
Extended Views
-
Last 30 Days: Detailed list of all logs from past month
-
Last 60 Days: Detailed list of all logs from past 2 months
Billable Tracking
-
Billable hours are indicated with a blue $ sign next to the logged hours in the timesheet table
-
Total Hours row shows a breakdown: Billable hours (blue) and Non-billable hours (gray)
Generating Reports
Report Configuration
1. Date Range Selection
Choose your report time period: This Week, Last Week, Last 30/60 days
2. Filter Selection
Available Filters:
-
Users Selection:
-
Viewing Timesheet dropdown — select one or multiple team members to view their timesheets (requires View All Worklogs or Edit All Worklogs permission)
-
Regular users see only their own data
-
-
Categories: Select specific work types (multi-select)
-
Subcategories: Filter by subcategories based on the selected categories
-
Projects: Include specific Jira projects (searchable multi-select)
All filters apply to both the on-screen table view and exported reports.
3. PDF Export
What's Included:
-
Report title with date range
-
Filter summary (categories, projects, assignees selected)
-
Aggregation tables with totals
-
Total hours and statistics
-
Generation timestamp
4. Excel Export
Click Export → Export as Excel to generate a styled .xlsx file.
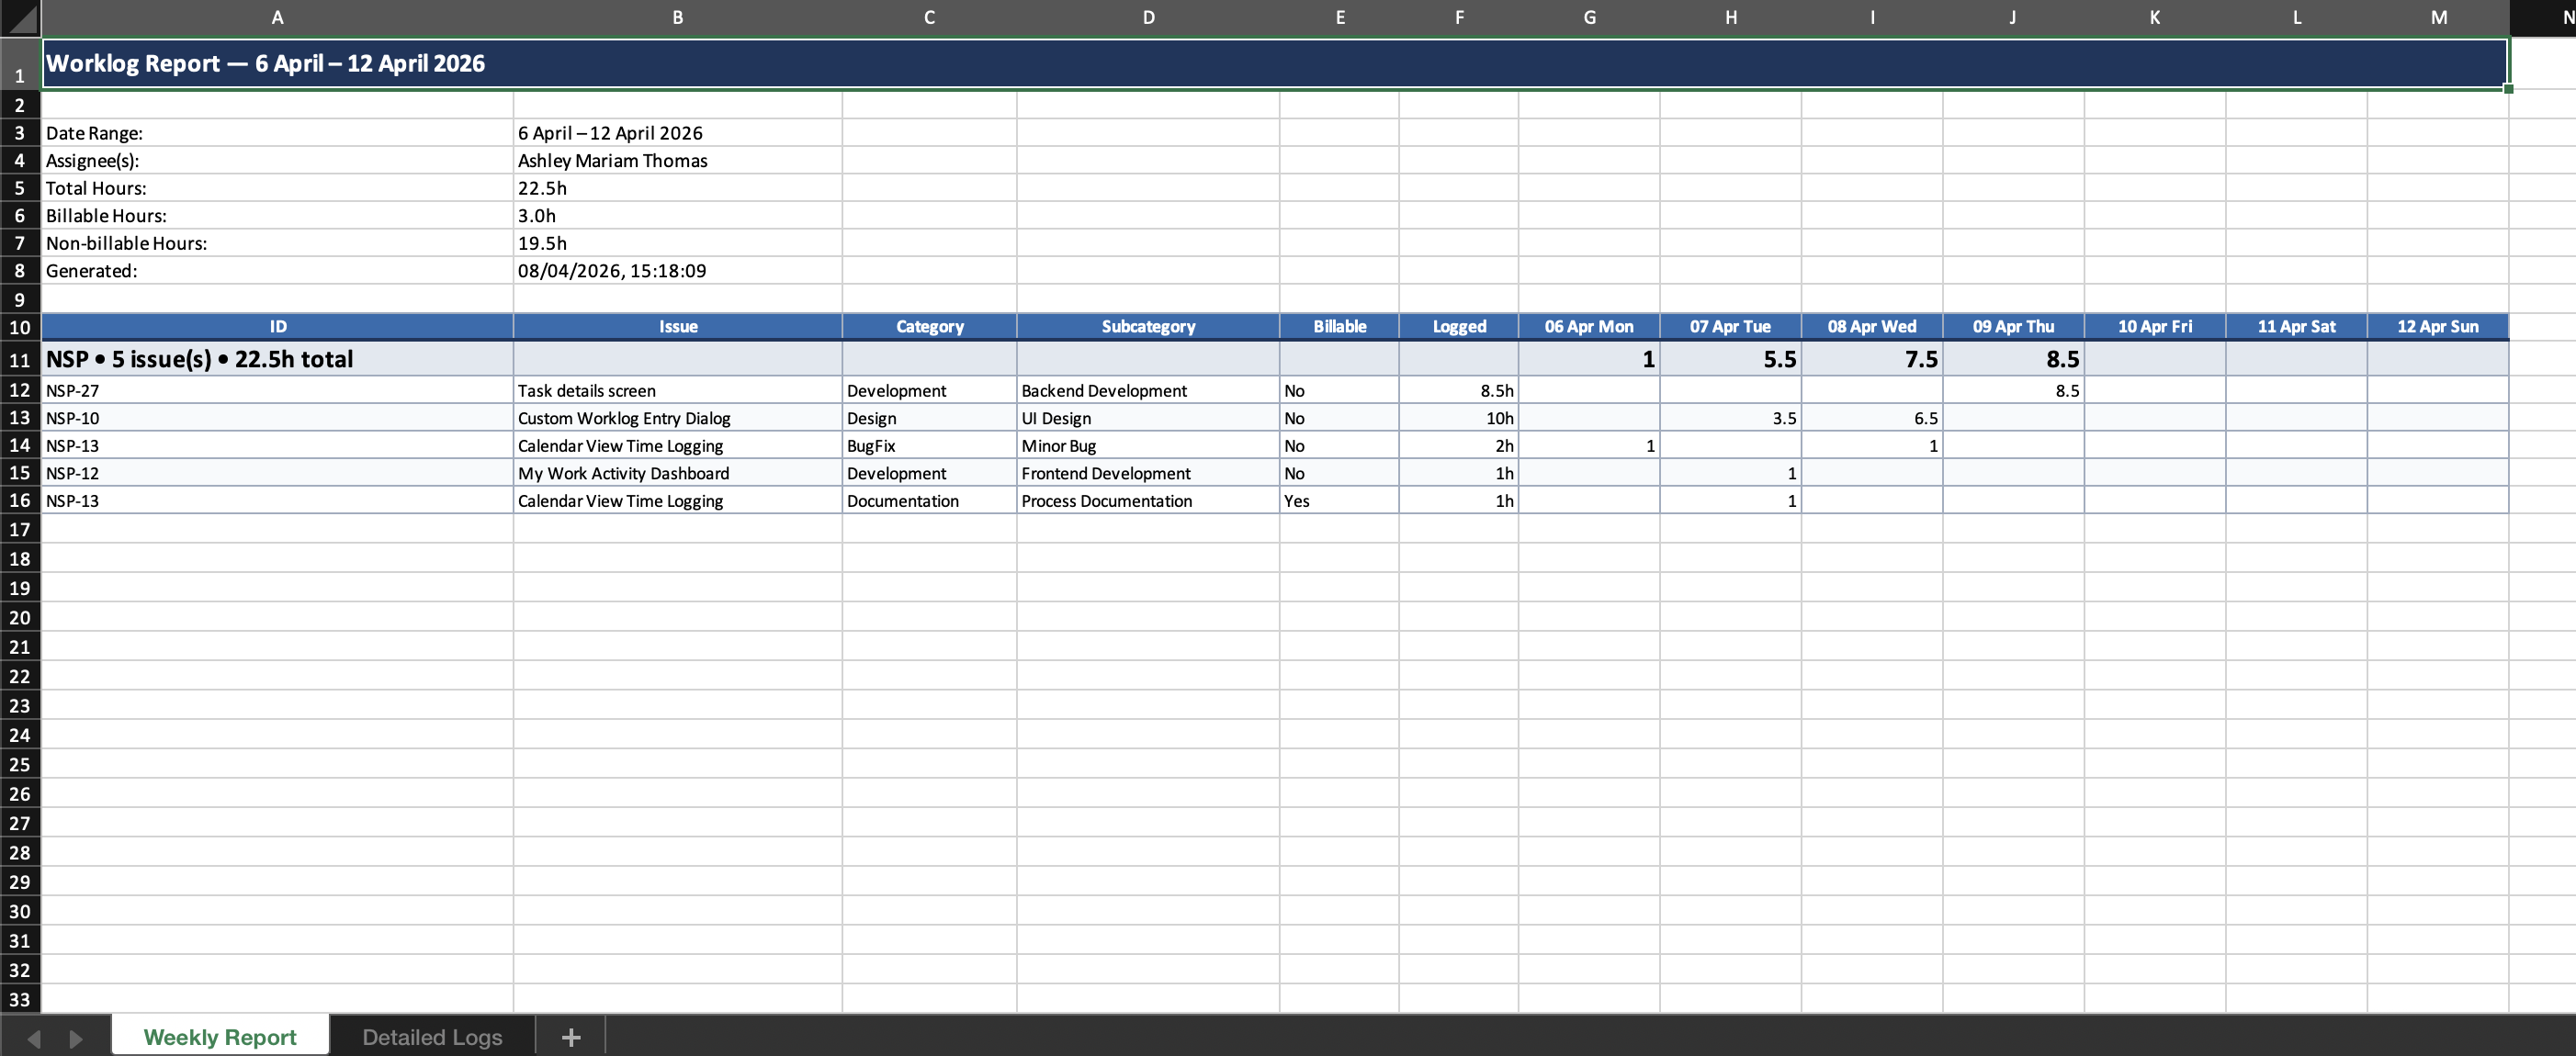
Weekly View generates two sheets:
Sheet 1 — Weekly Report:
-
Summary section: date range, assignee(s), total hours, billable hours, non-billable hours, generation timestamp
-
Data grouped by Project → Assignee (when multiple users selected)
-
Billable status per issue
-
Styled with color-coded headers, project rows, user rows, and alternating data rows
Sheet 2 — Detailed Logs:
-
Individual worklog entries
-
Grouped by assignee with total hours per assignee
-
Shows the actual worklog description entered by the user
30/60 Day View generates one sheet:
-
Summary section: date range, assignee(s), total hours, billable hours, non-billable hours, generation timestampIndividual log entries grouped by assignee
-
Billable status per entry
Formulas: Sum formulas for easy manipulation
Settings - Category Management & Preferences
Admin Access Only
Manage work categories and subcategories for organizing time logs across your team.
Requirements:
-
Jira Administrator permissions required
-
Access: Click Settings in sidebar (only visible to admins)
Access Denied? Contact your Jira admin to grant "Administer Jira" permission.
1. Categories
Top-level classifications for work types (e.g., Development, Testing, Design, Meeting).
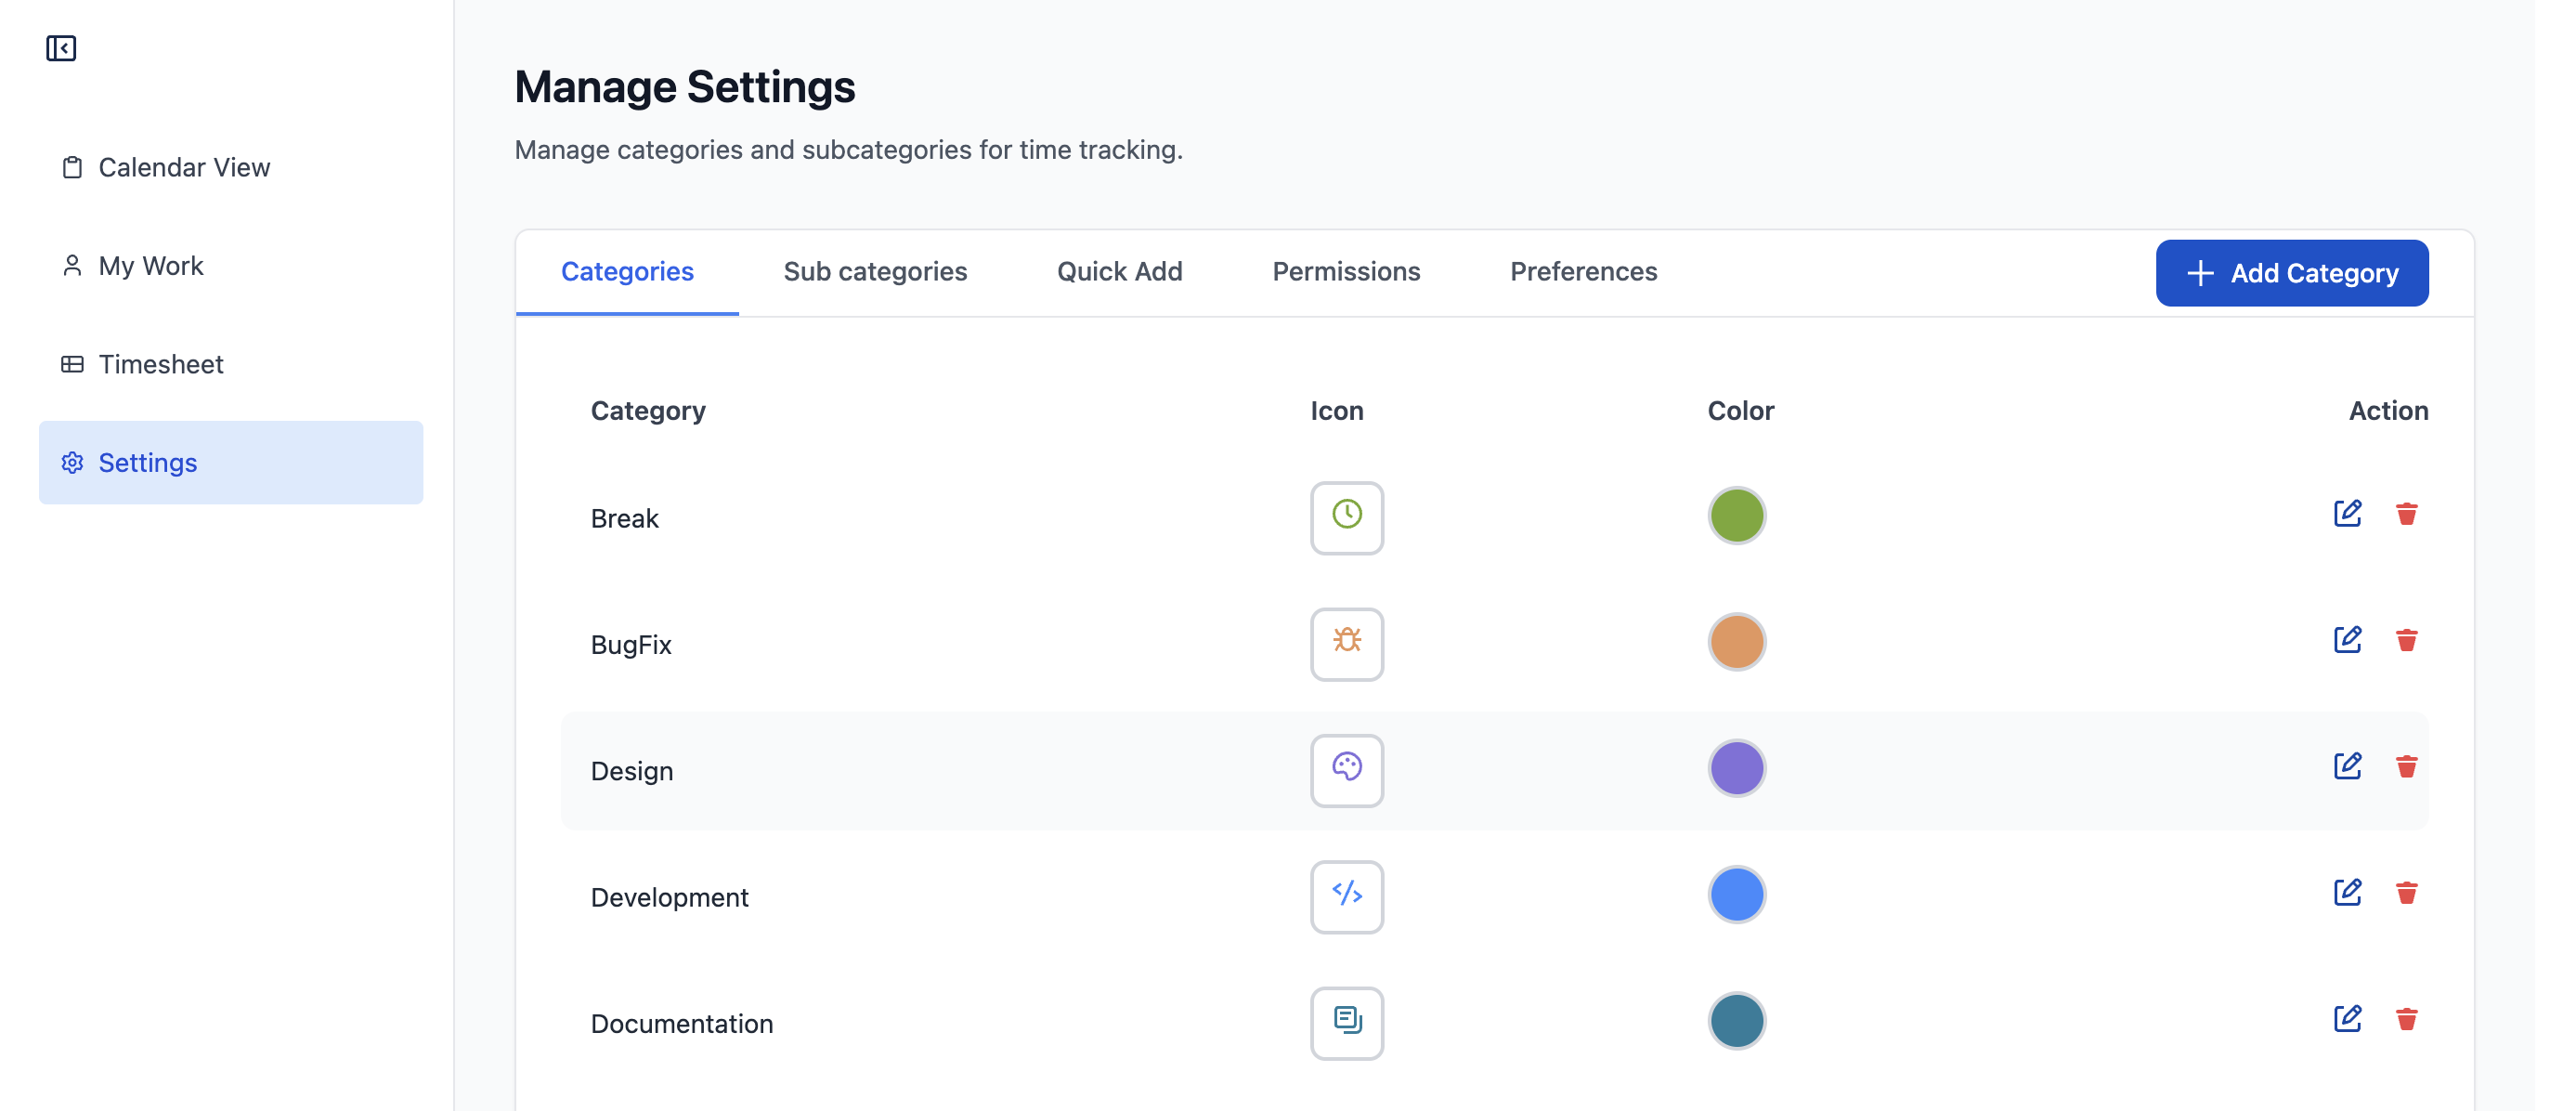
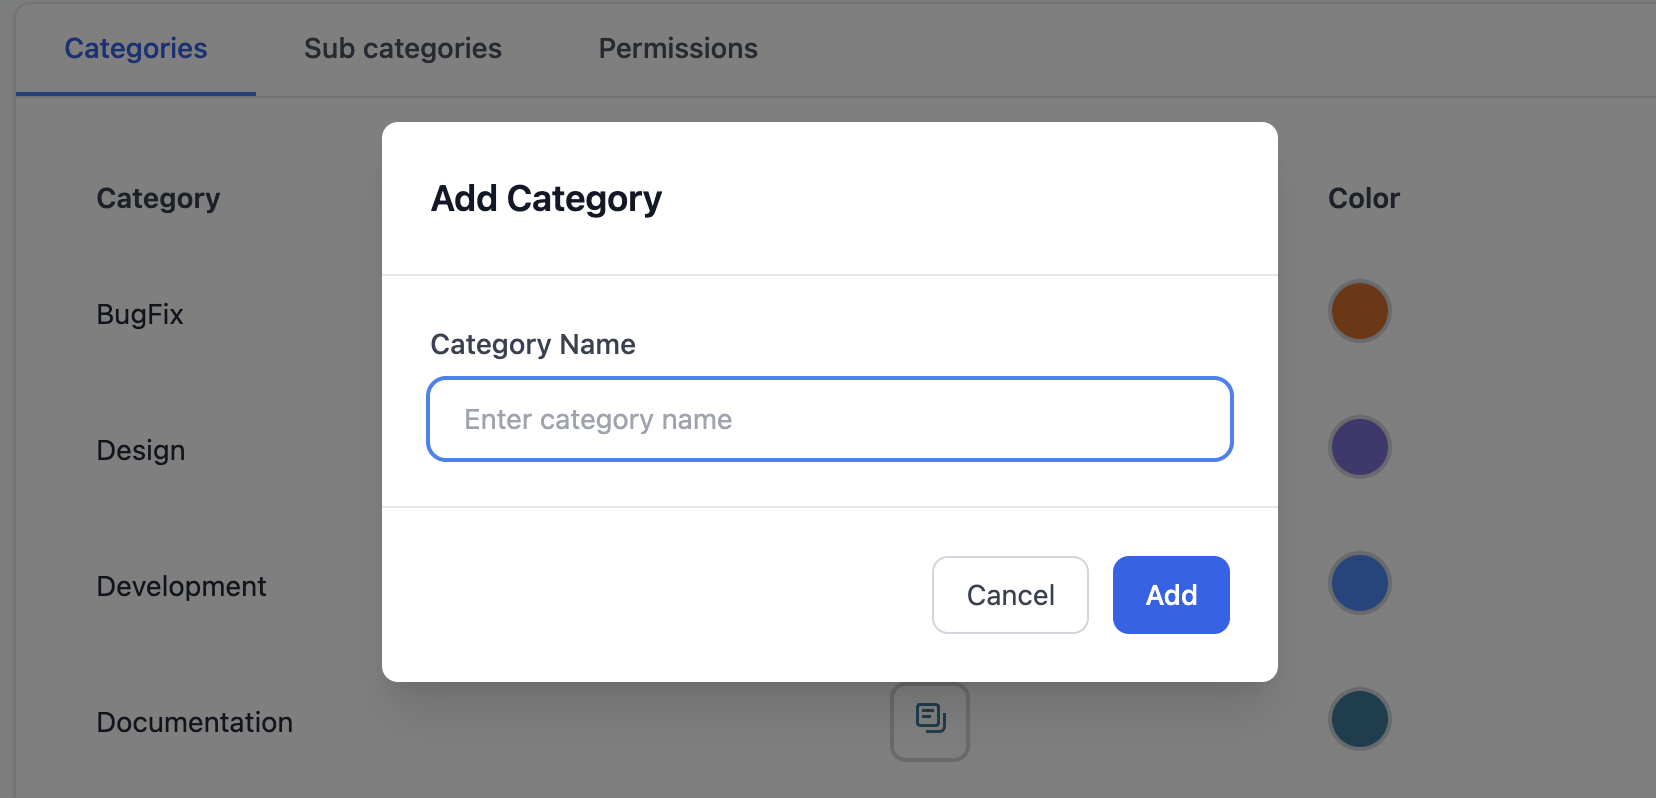
Add Category
-
Enter category name in input field
-
Click "Add Category"
-
Category appears immediately, available for all users
Edit Category
-
Click Edit icon next to category
-
Modify name in text field
-
Click green checkmark to save
-
Click X to cancel

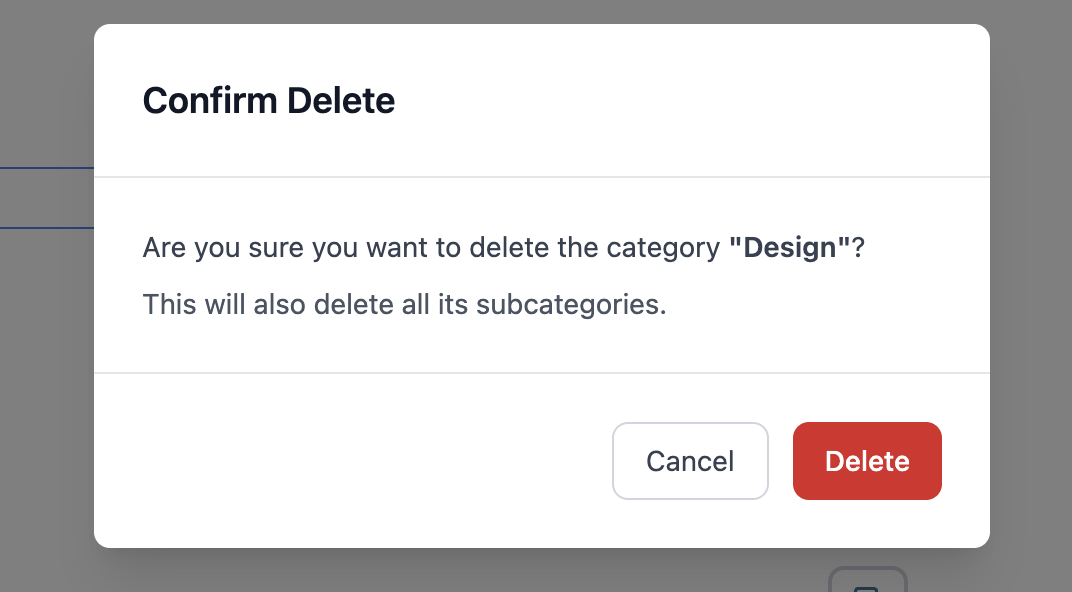
Delete Category
-
Click Delete icon (trash) next to category
-
Confirm deletion
⚠️ Warning:
-
Deletes all subcategories under this category
-
Permanent - cannot be undone
-
Existing worklogs keep the category name for historical records
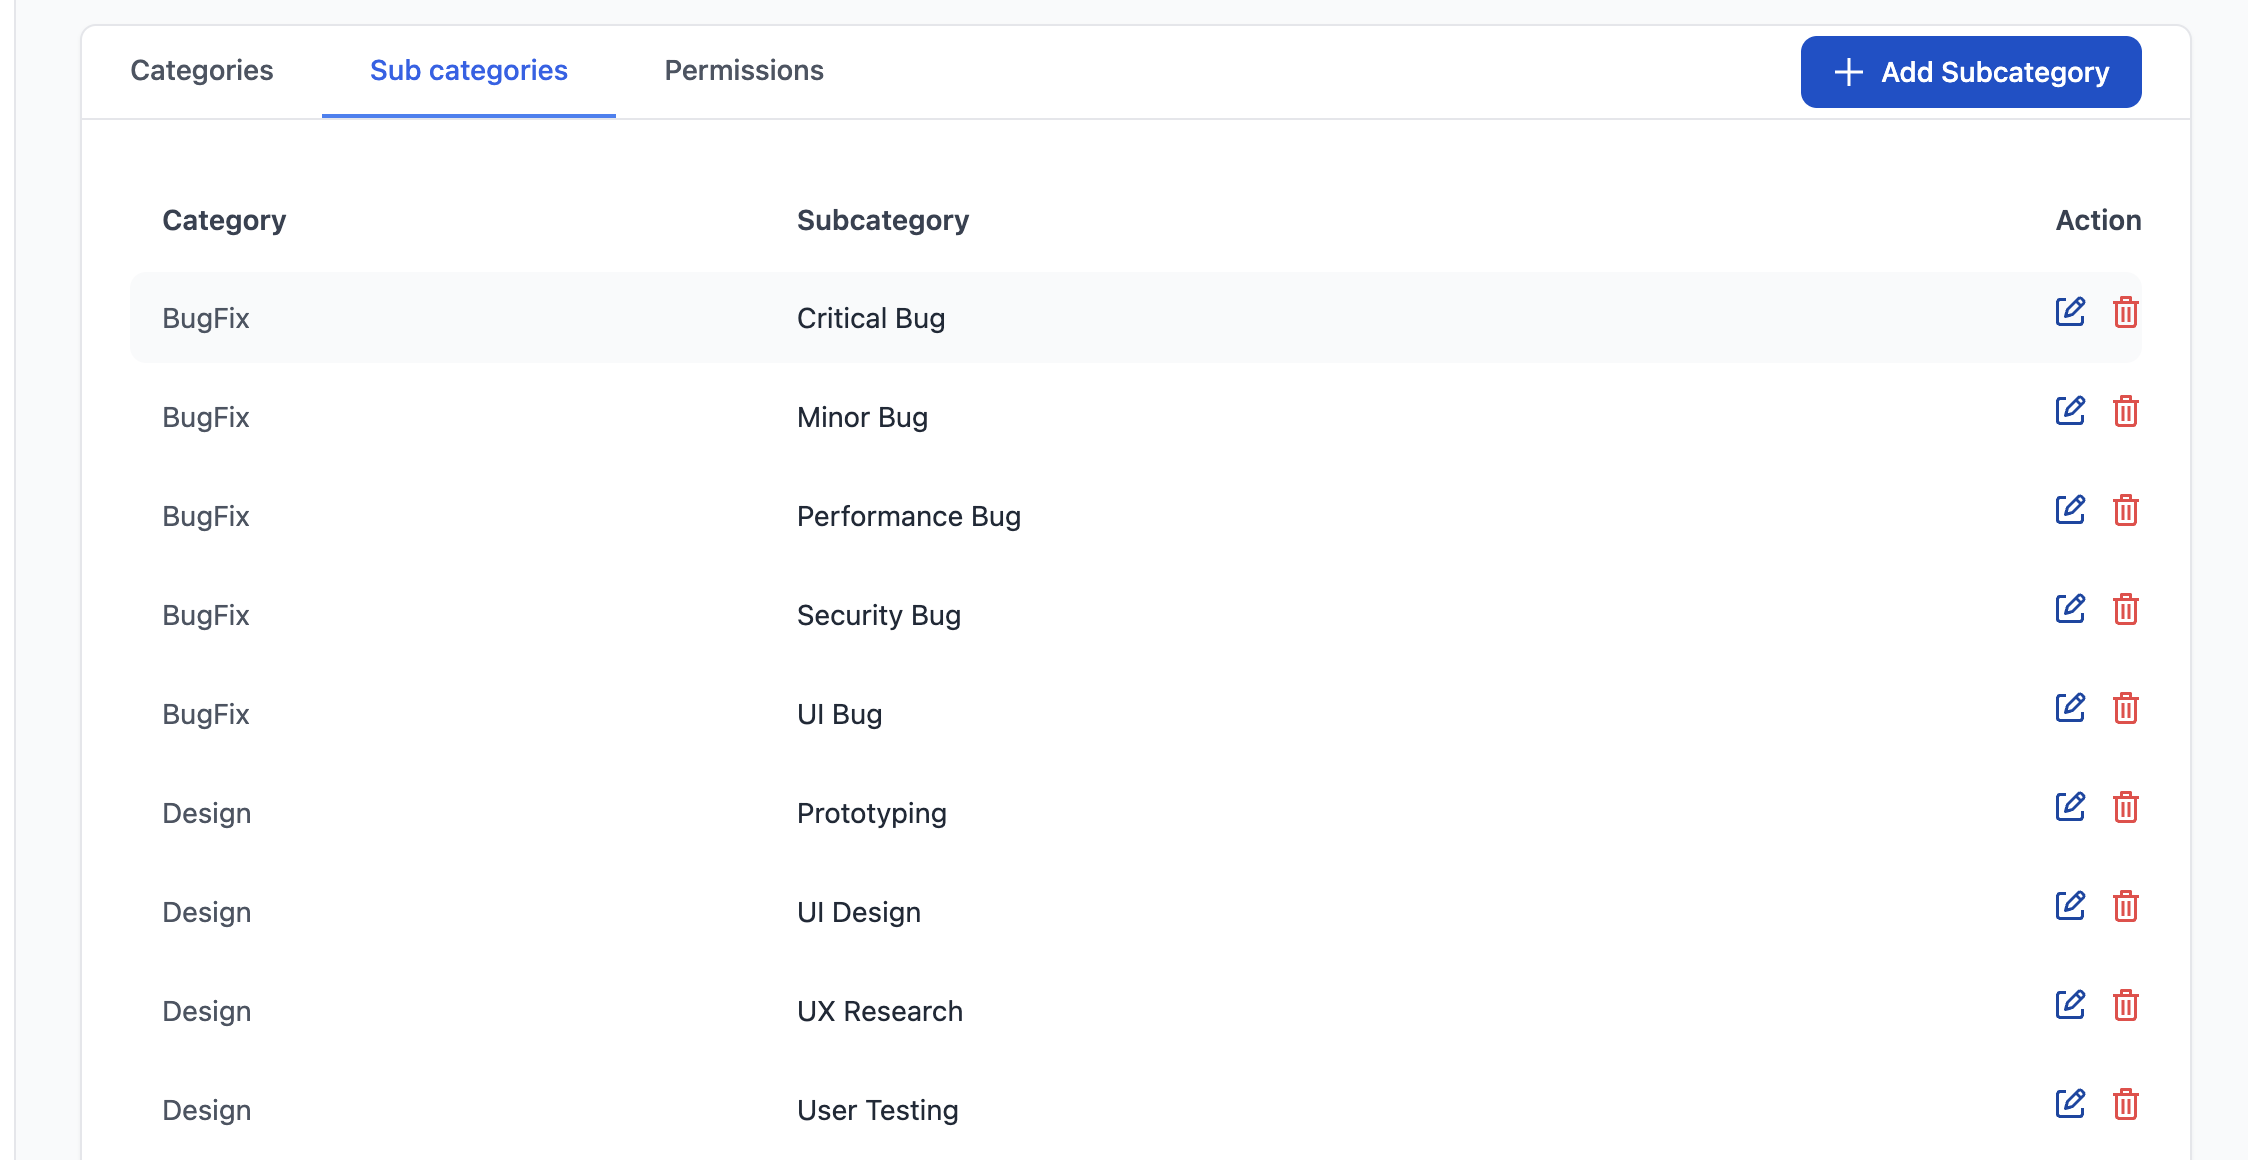
2. Subcategories
Add Subcategory
-
Select parent category from dropdown
-
Enter subcategory name in input field
-
Click "Add Subcategory" or press Enter
-
Subcategory appears under parent category
Edit Subcategory
-
Click Edit icon next to subcategory name
-
Modify name in text field
-
Click green checkmark to save or press Enter
-
Click X to cancel or press Escape
Delete Subcategory
-
Click Delete icon next to subcategory name
-
Confirm deletion
-
⚠️ Warning: Permanent deletion (cannot be undone)
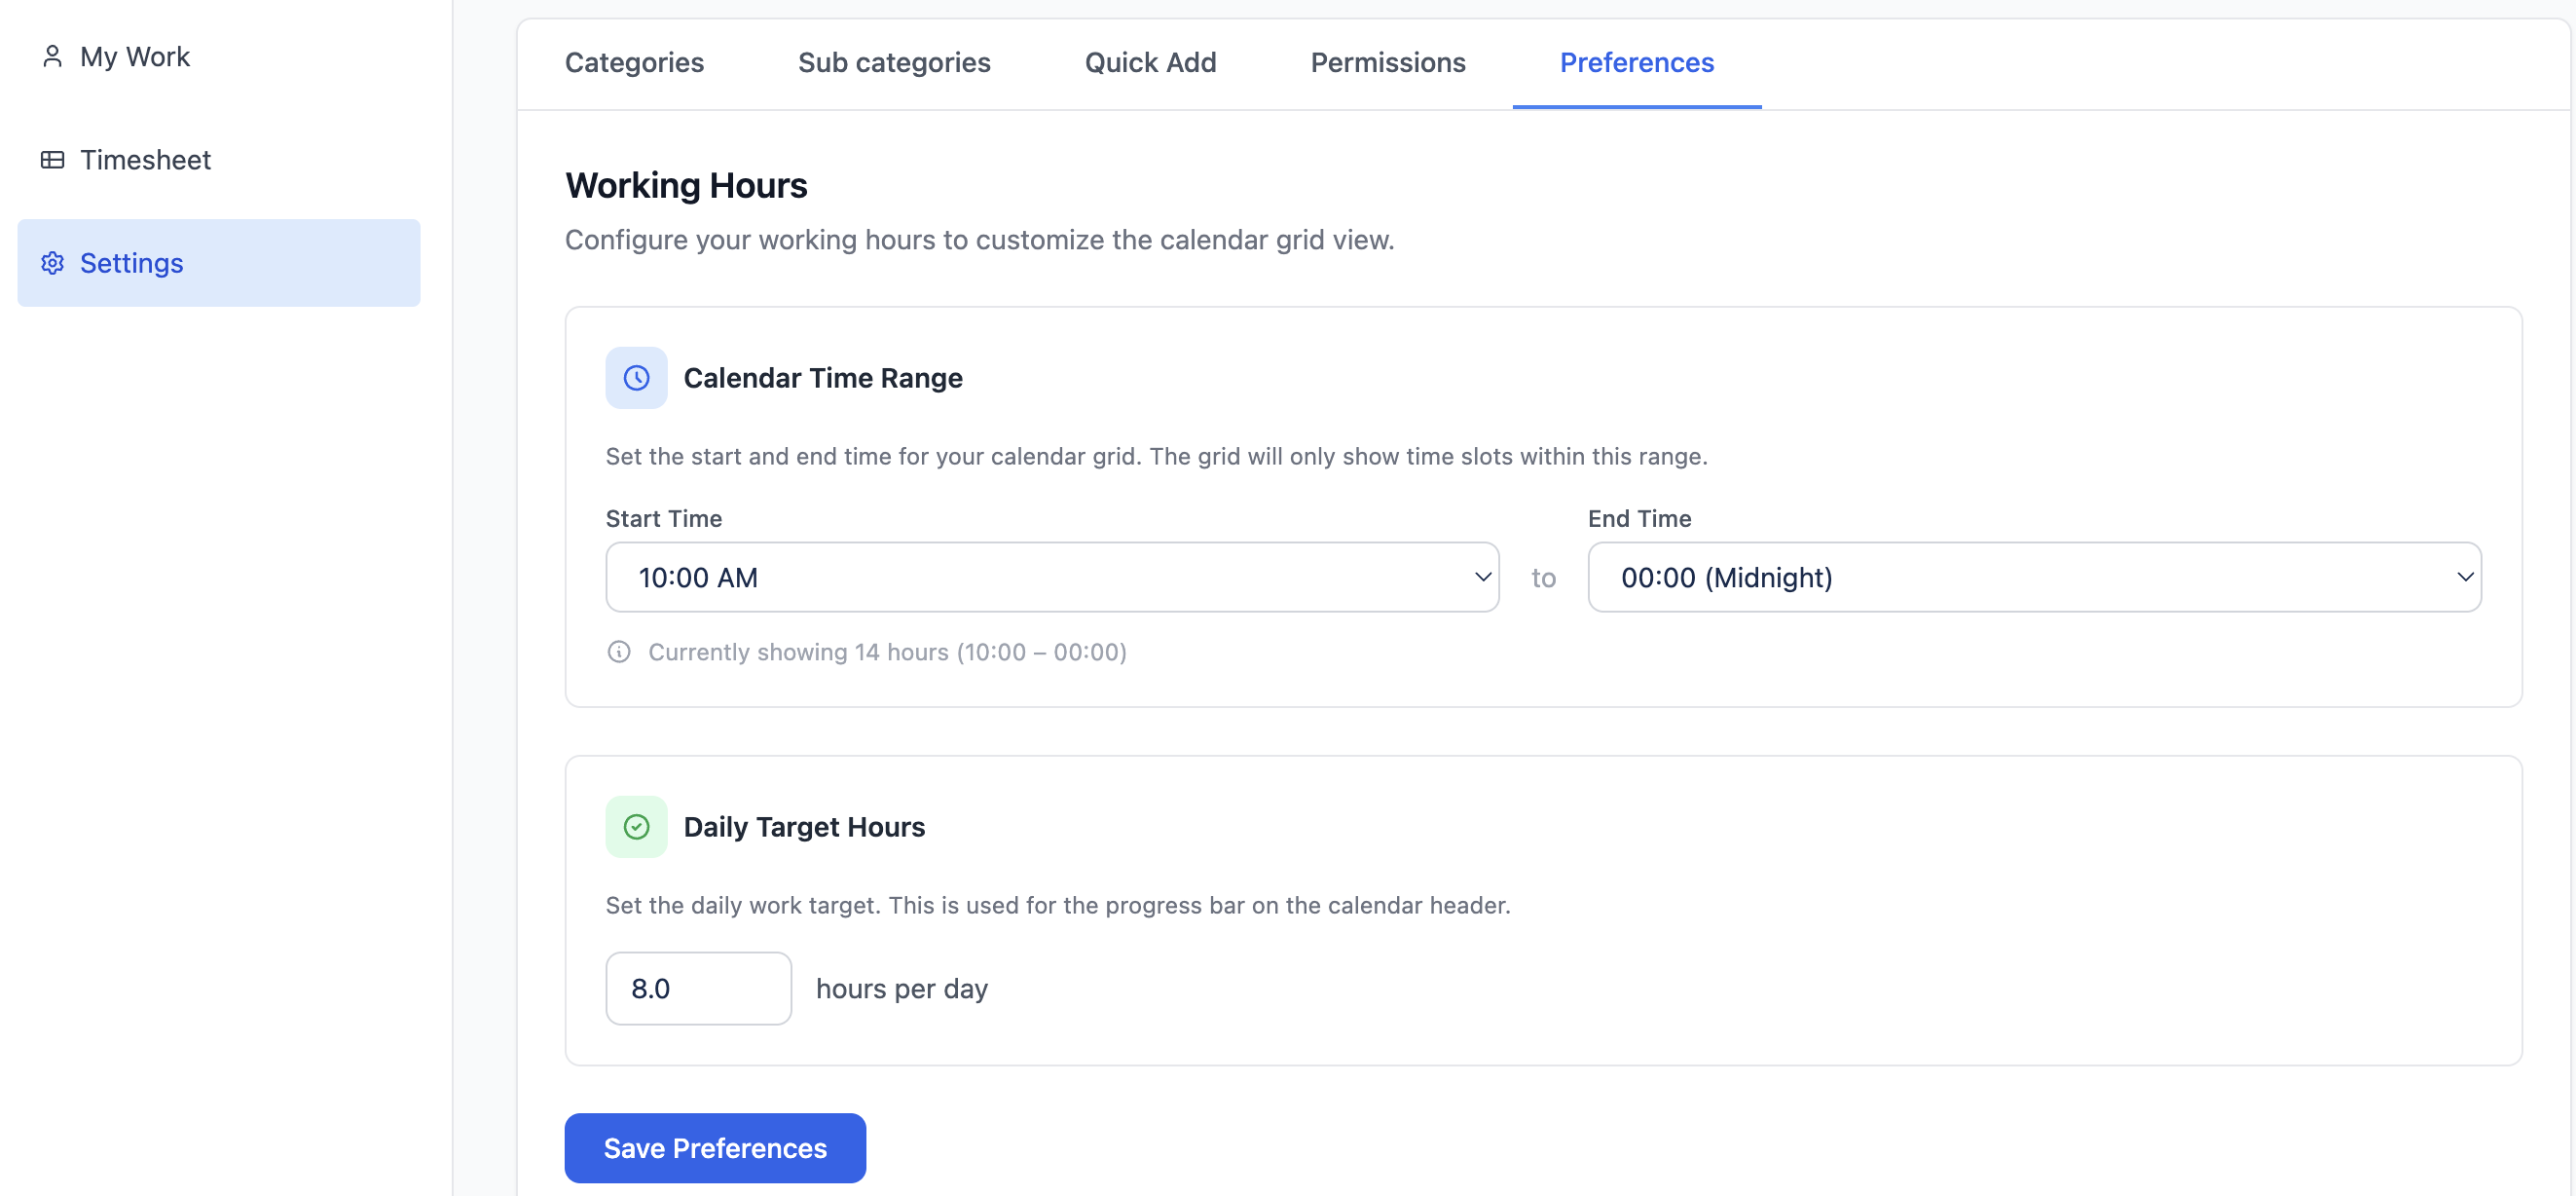
3. User Preferences
Configure your personal working hours and daily targets from Settings → Preferences.
Calendar Time Range
Set the start and end time for your calendar grid.
-
Default: 9:00 AM to Midnight
-
Example: Set 10:00 AM to 7:00 PM for a standard workday
Daily Target Hours
Set your daily work target used for the progress bar on the calendar header. Each day column shows progress toward this target with color indicators.
-
Default: 8 hours per day
-
Green: near or at target
-
Yellow: partially complete
-
Red: below target
-
Blue with overtime label: exceeded target