.png)
5. Create a Custom Widget
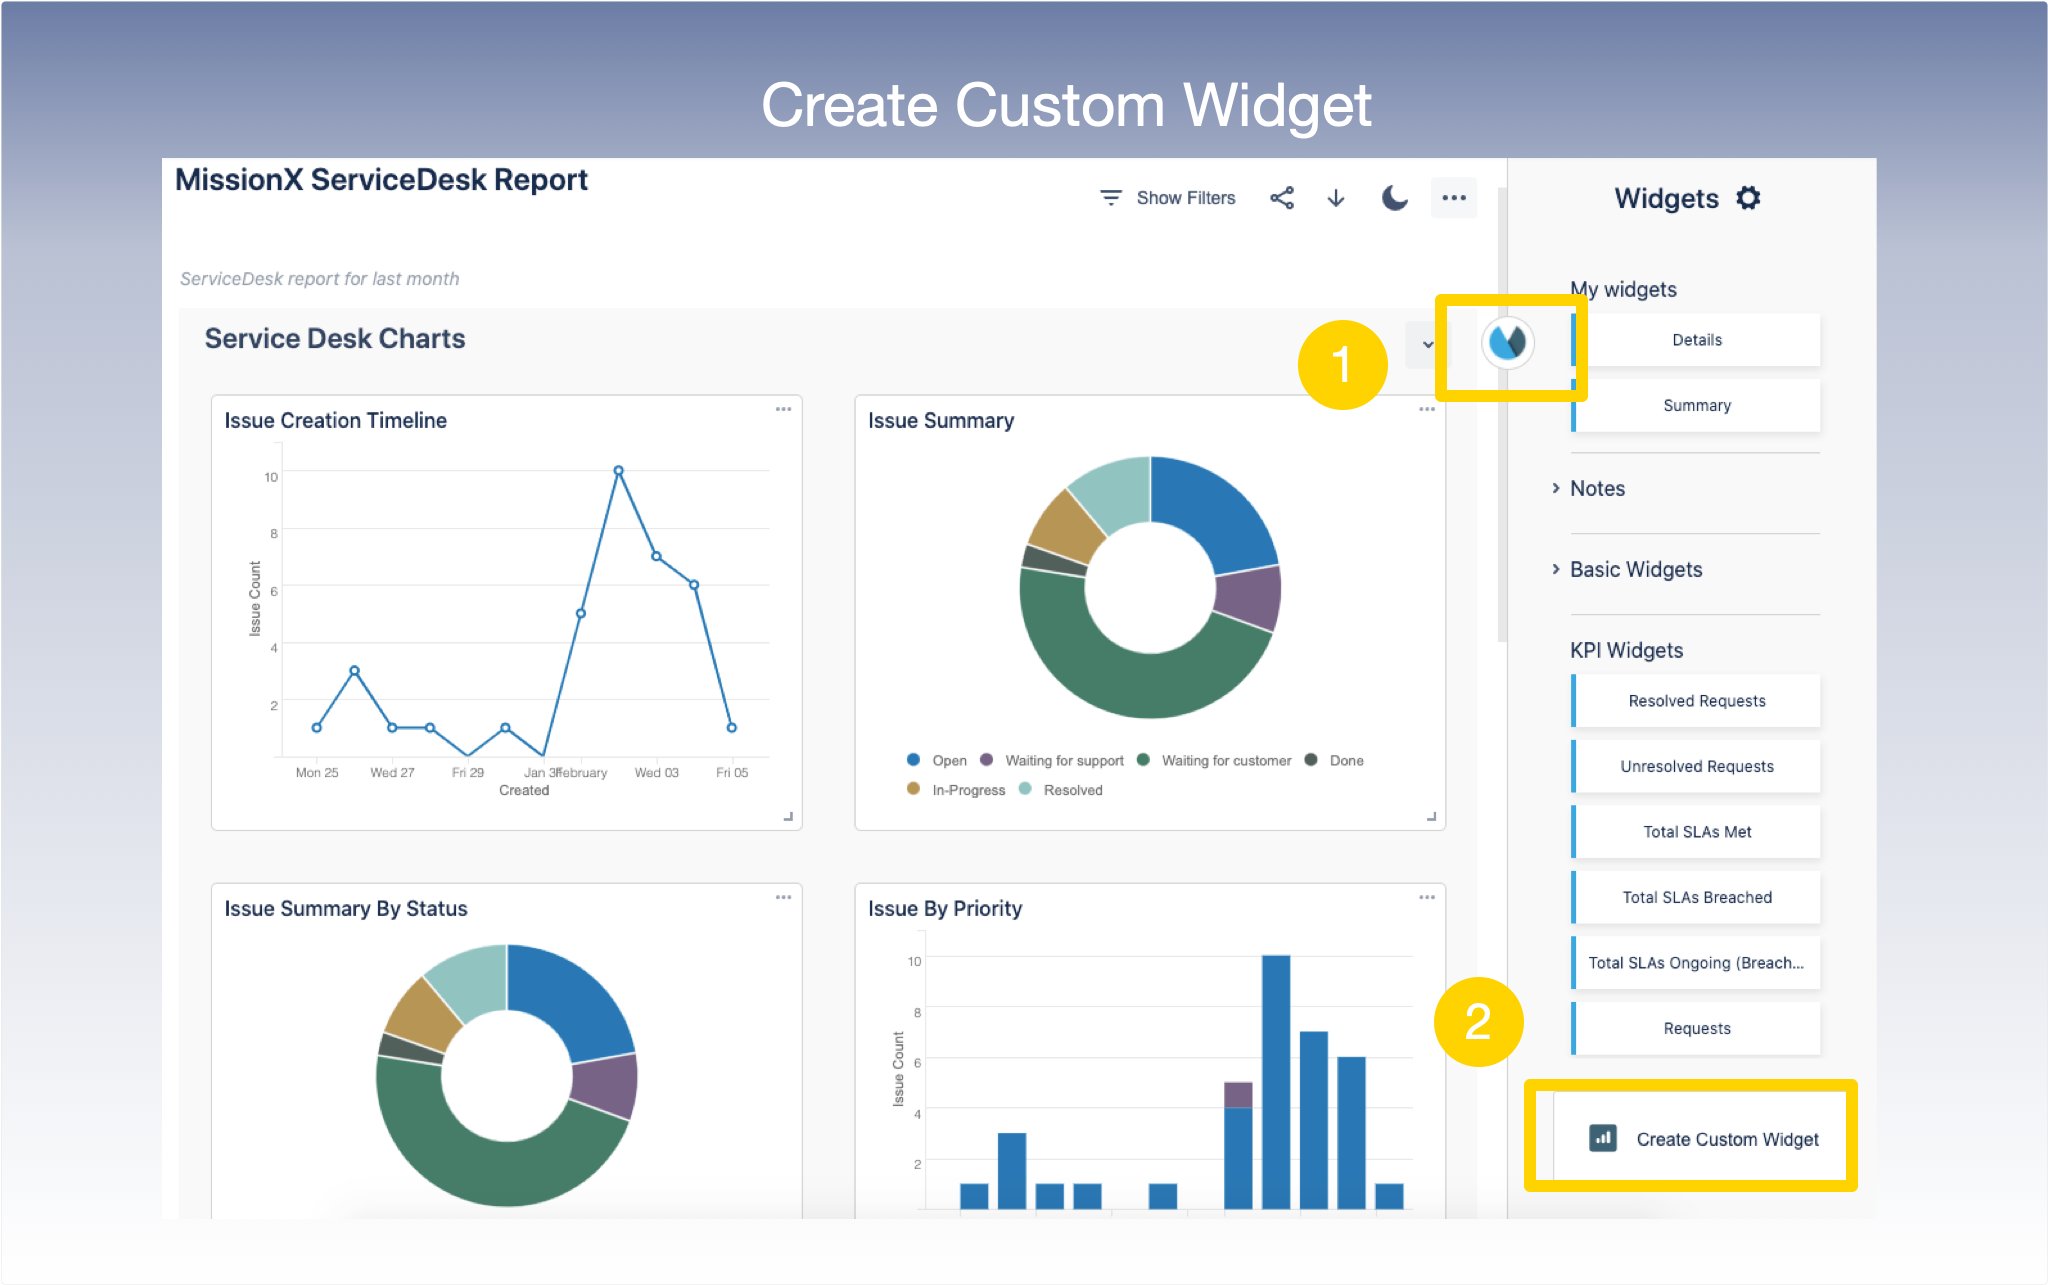
You have the option to create a custom widget tailored to your particular needs by following these steps:
1. Inside the View, Click App icon to show the Widget Panel
2. Within the widget panel click Create Custom Widget
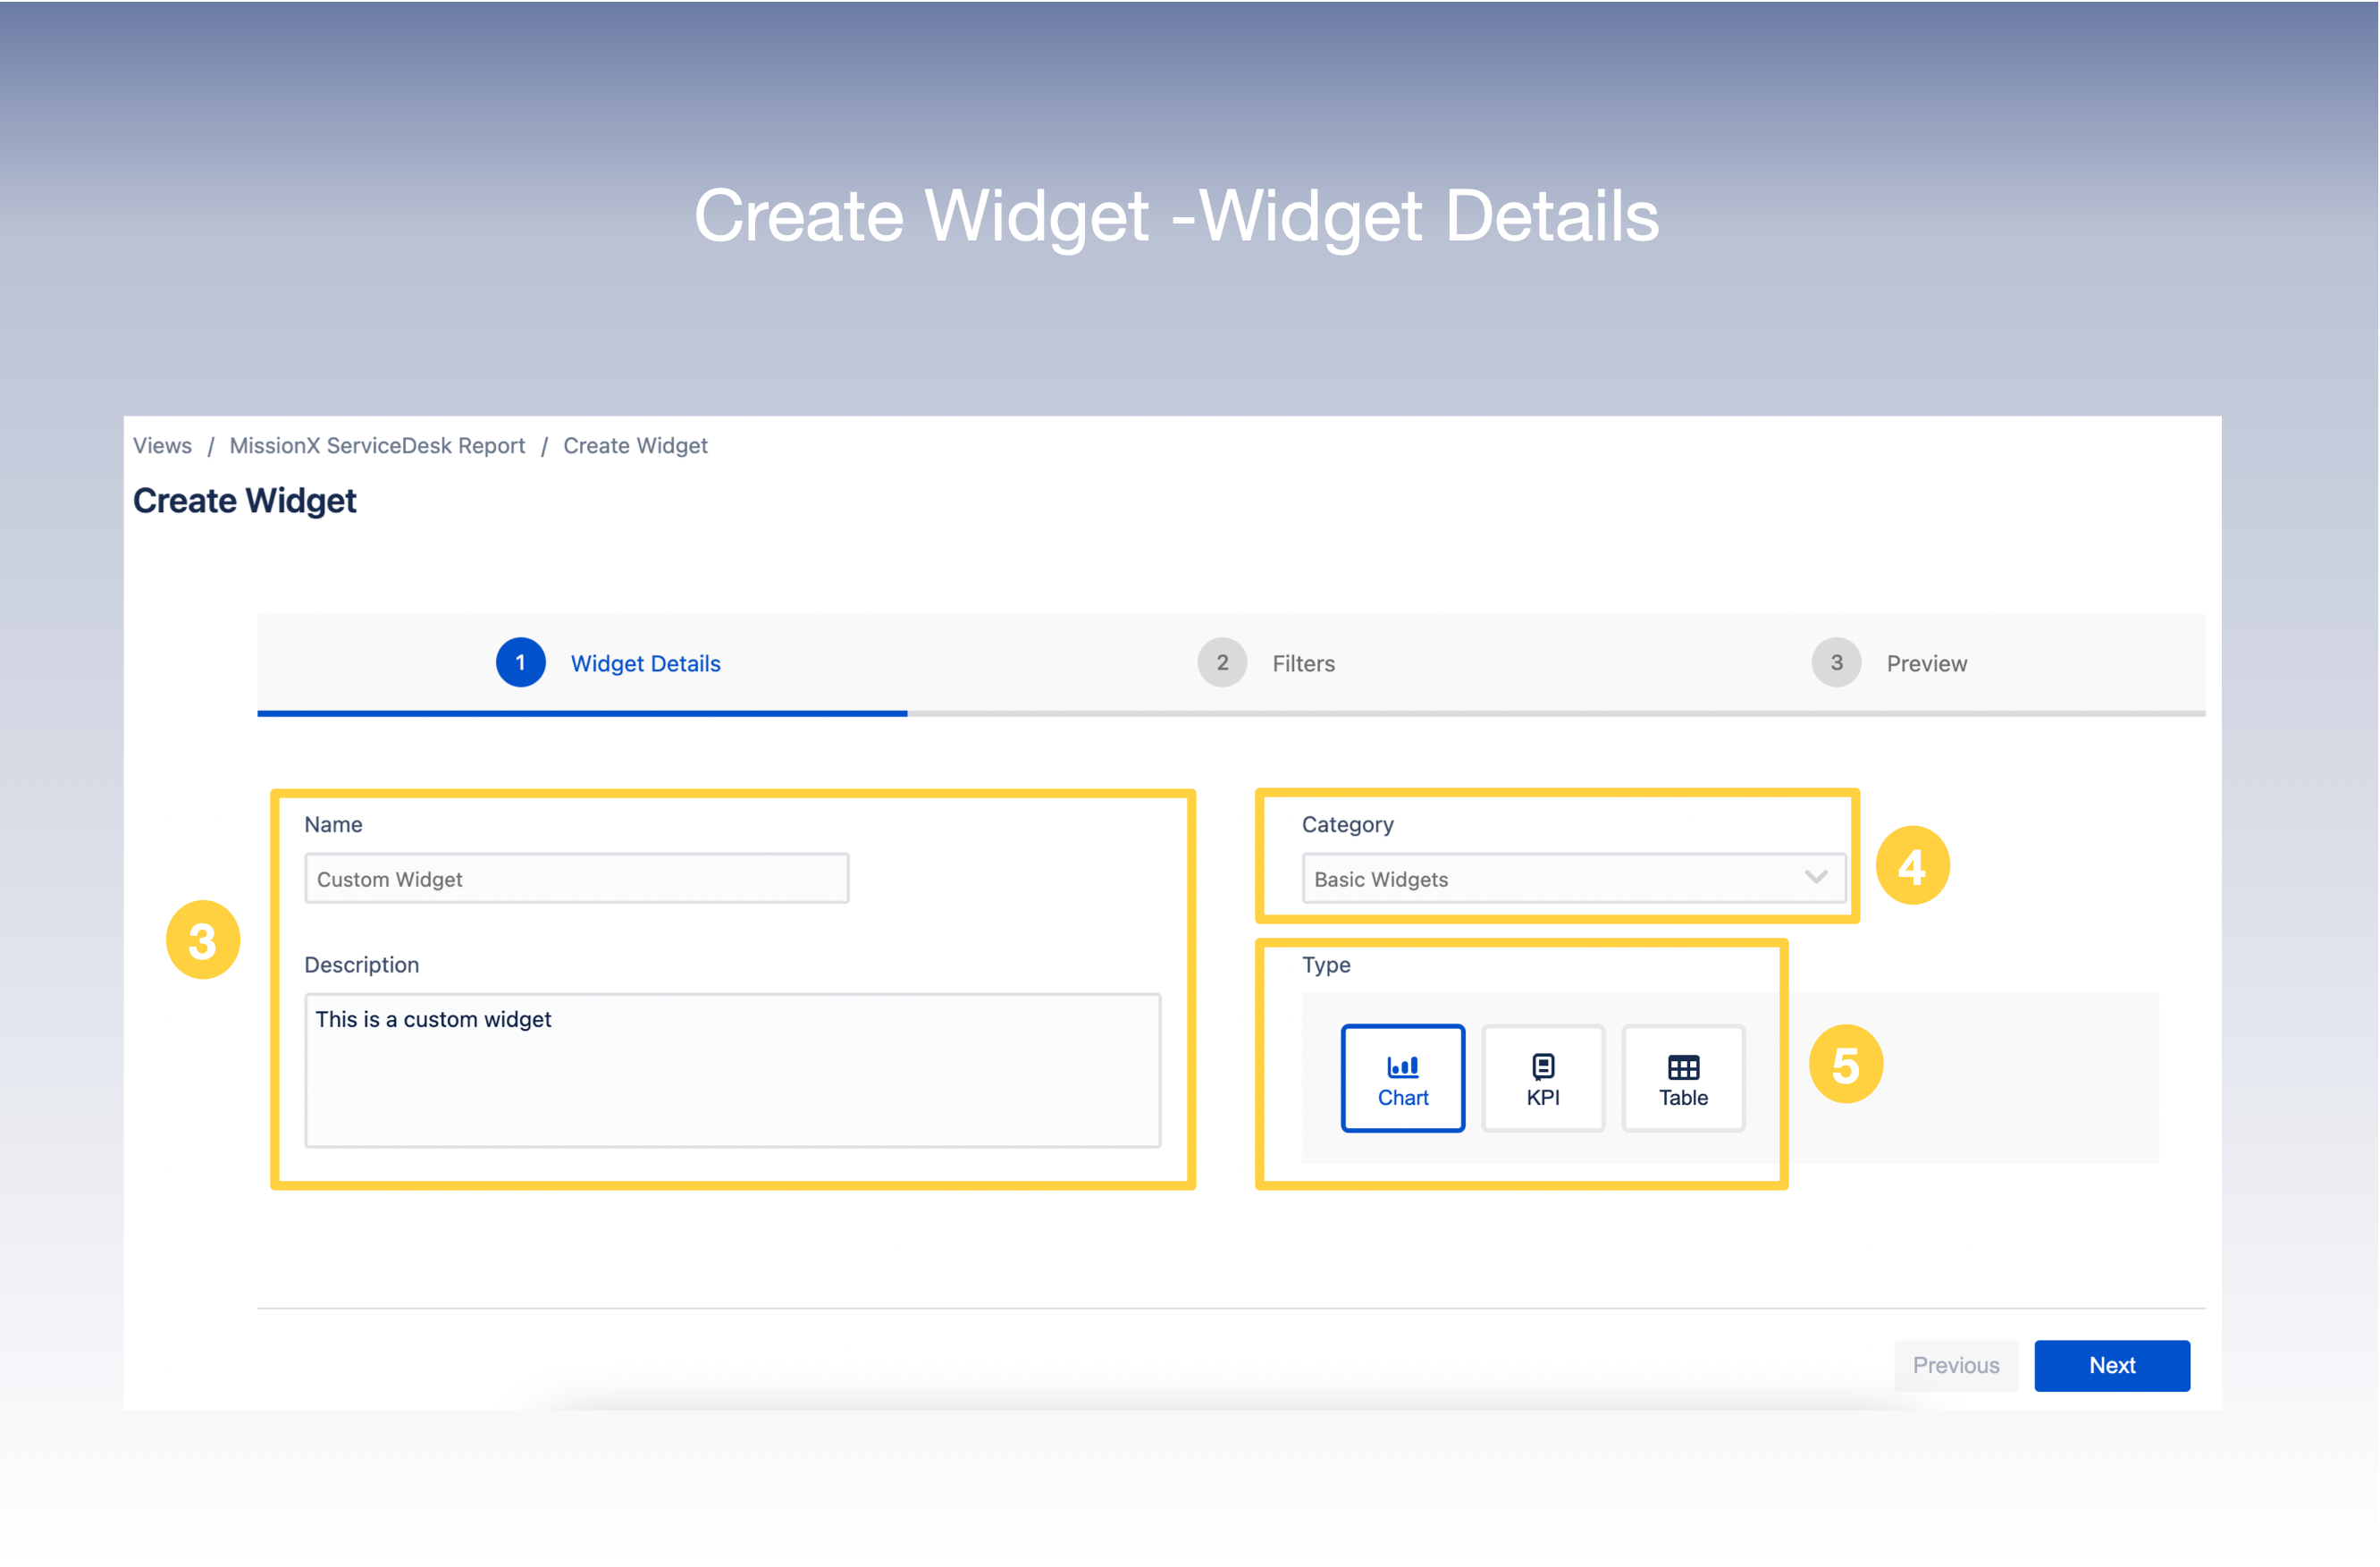
3. Enter Widget Name and Description
4. Select the Widget Category :(My Widgets/Basic Widgets/KPI Widgets/ Service Desk Widgets/Notes
5. Choose the type of widget you want to create: KPI, Chart or Table
6. Click Next
7. In the next screen, select the Filters you wish to apply to your view .
8. You can choose between Custom Chart and Built-in Chart.
9. Select your Filter criteria from the drop down lists.
10. There is also an option to add More Filters.
11. Click Next

12. You are now at the Preview Page. The Preview of the Custom Widget created would be displayed on the screen.
