
Put labels (tags) on files so they are easy to find later, one file at a time or on multiple files at once.
Apply an existing label
-
Open Apps → Attachment Manager and find the file on the Attachments tab.
-
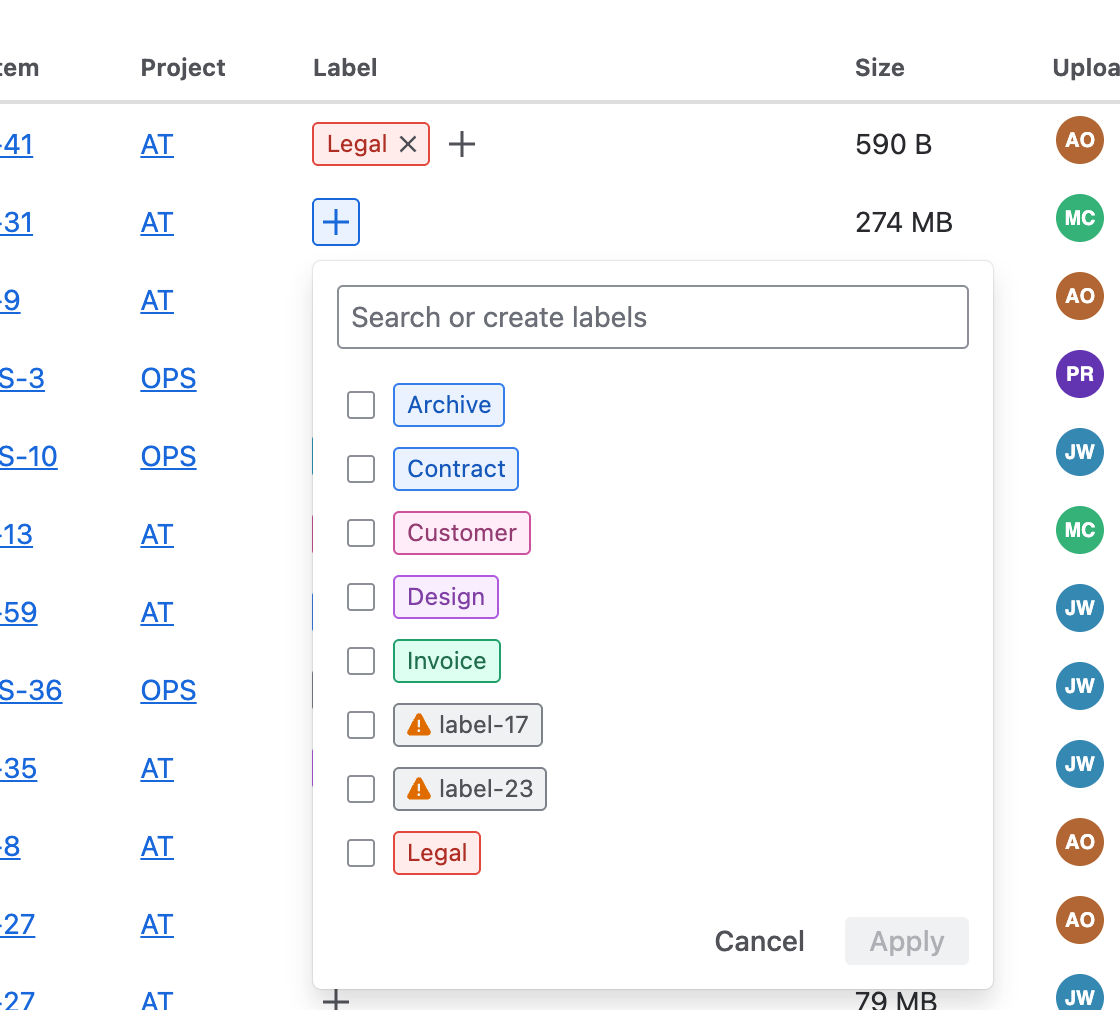
Select + in the file's Label column.
-
Tick one or more labels.
-
Select Apply. The labels appear beside the file.
On a work item, select + beside a file in the Attachments panel and pick a label. It is added straight away; select Done to close the list.
Remove a label from a file
Select the × on the label beside the file. The label itself stays available for other files, and the file stays in Jira.
Add a label to several files
-
On the Attachments tab, tick the files, up to 100 at a time (see Limits). The box at the top of the list ticks the whole page.
-
Select Add label in the bar that appears.
-
Tick the labels.
-
Select Apply. A message confirms how many files were labelled.
The same bar has Download and Delete, and on the Advanced edition Add to folder. Delete permanently removes files from Jira; see Search and filter attachments.
Permissions
To change a file's labels you need permission to edit its work item in Jira.
Related pages