🚀 Quick Start for view26 Reports for Jira
view26 Reports for Jira is the free and limited version of Charts & Reports for Jira. Except issue-limiting it has the same set of features. You can reach documentation of the pro app here.
1. Access the App
1. Install view26 Reports for Jira App from the Atlassian Marketplace
2. Log in to Jira
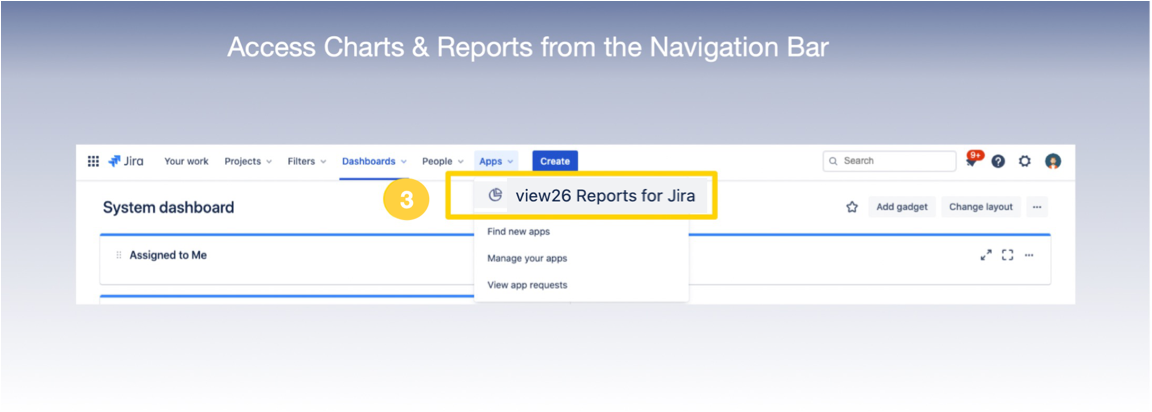
3. Click on view26 Reports for Jira in the Jira ServiceDesk Global navigation-bar to enter the app

Access App from the Navigation Bar
2. Create a View
A view is a collection of widgets, which the user can share, view or generate reports from.
To create a new view:
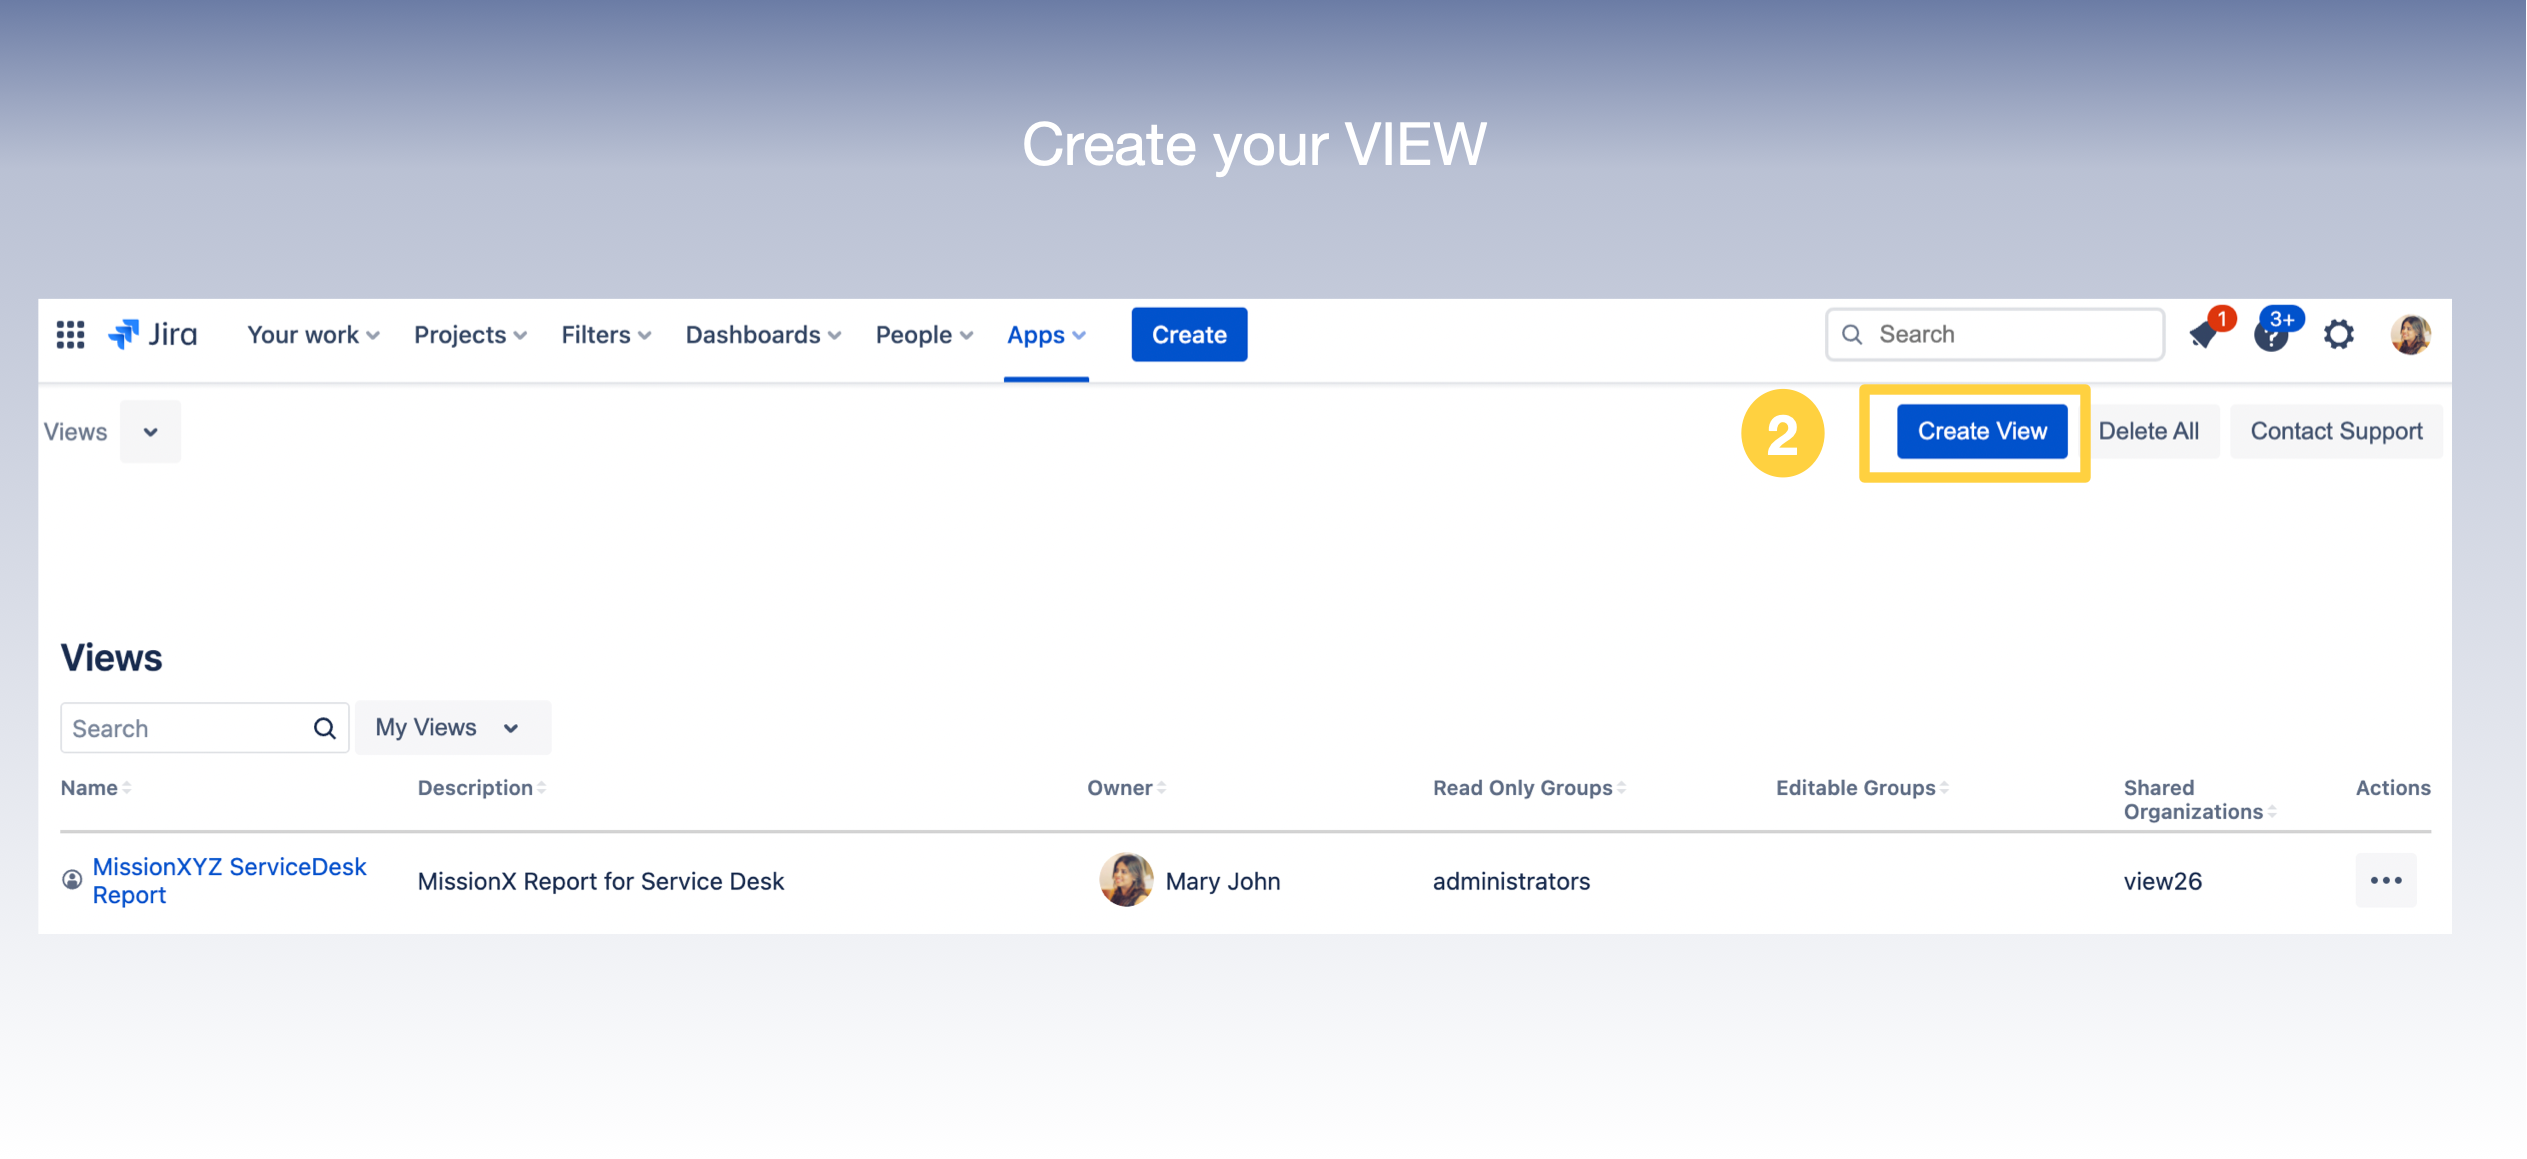
1. Select Charts and Reports in the Apps menu of your Jira Service Desk
2. Select Create View*
* If this is your first view, the 'Create View' button would be located at the bottom right corner of the browser screen. For subsequent views/ existing views, it would be located at the top right on the screen.

3. Add Widgets to a View
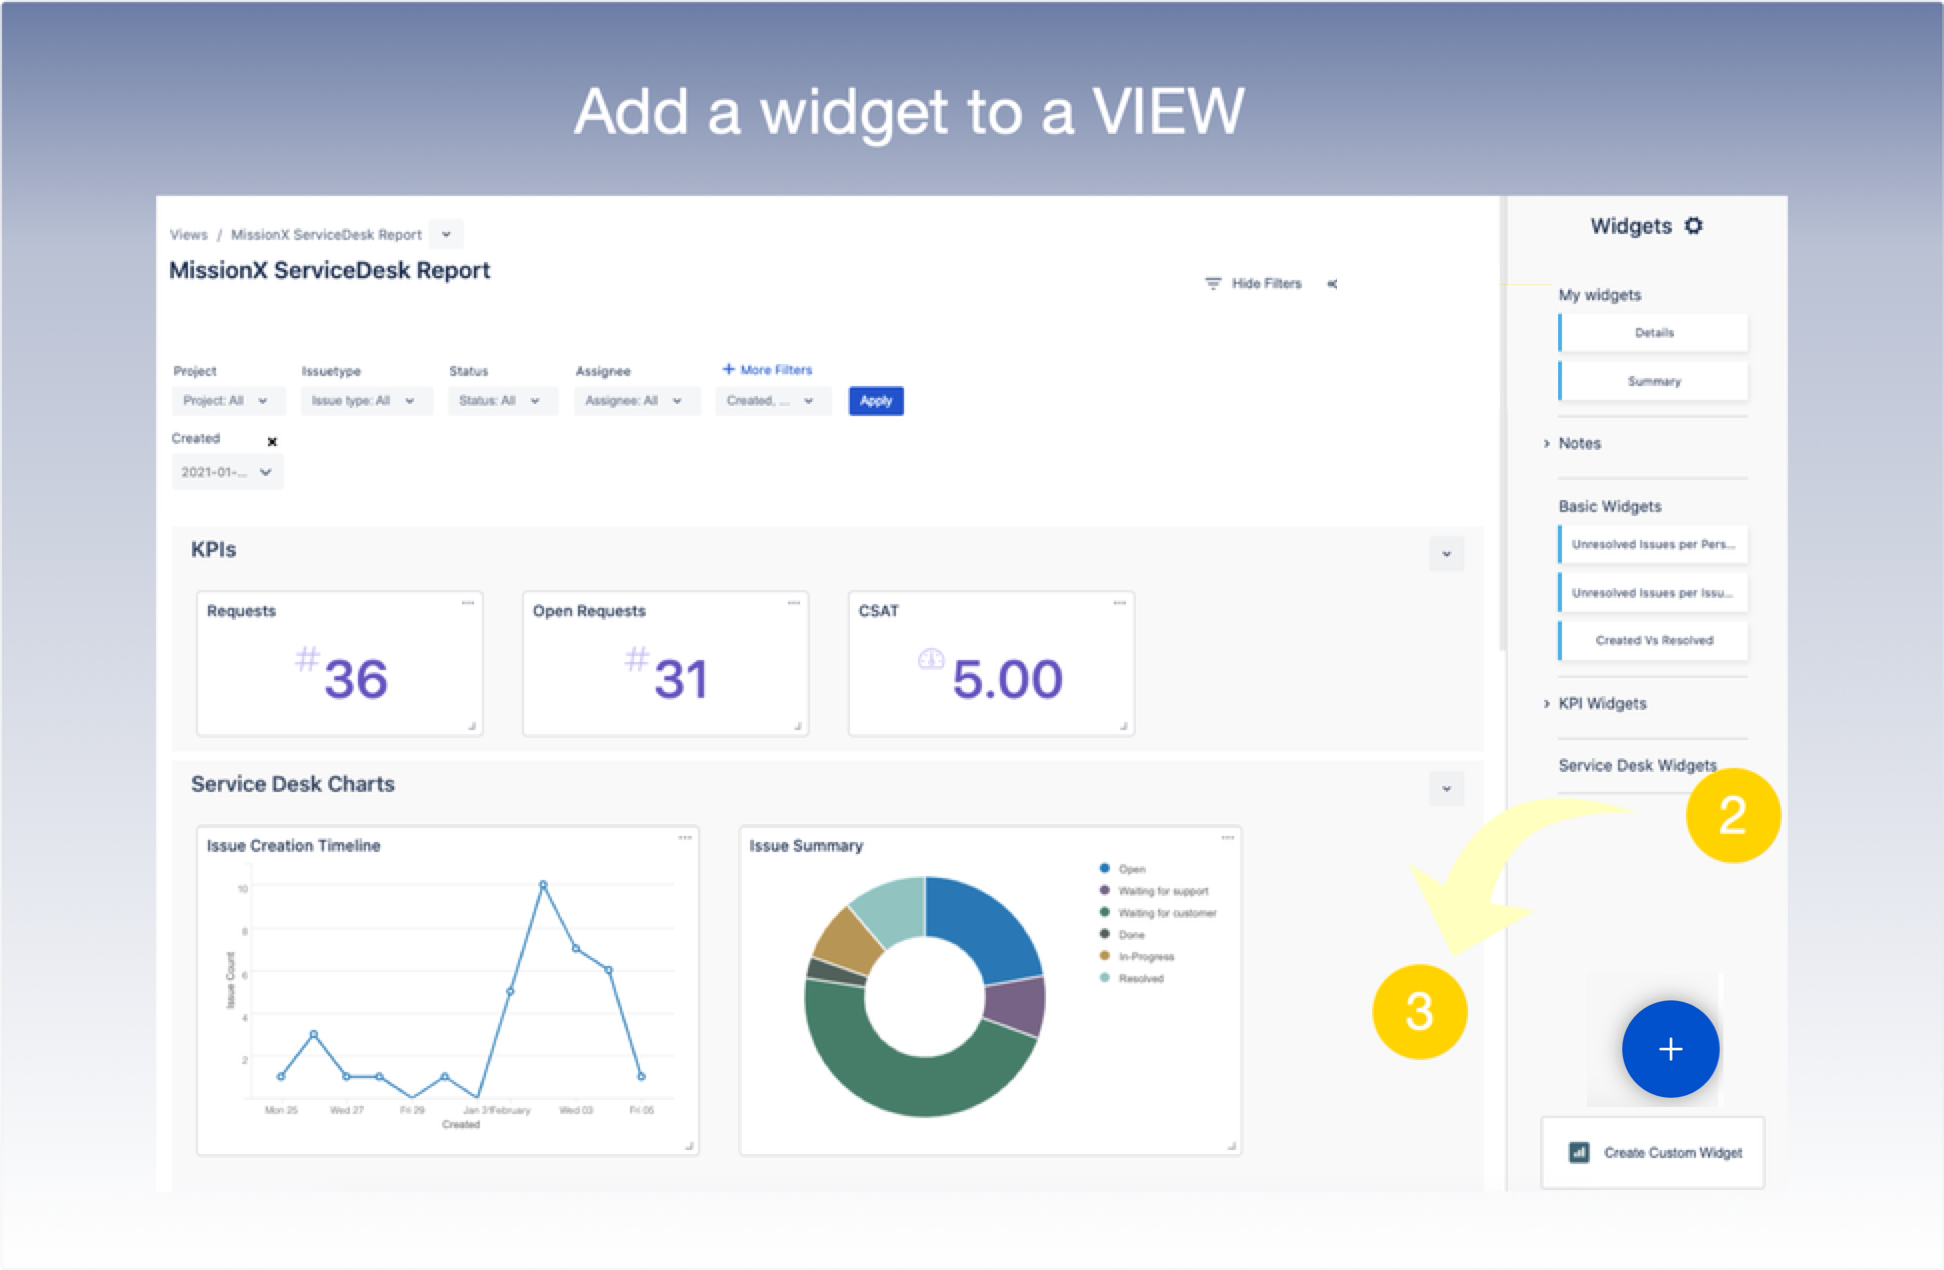
Add an existing widget to a view by following these steps: Select the view, from the Home page.
1. Inside the view, Click + icon to open the Widget Panel
2. Select the widget you want to add from the list in the Widget Panel.
3. Drag and drop the widget into the relevant section

4. Share a View
Click the Share icon on the top of the page. The following options exist for sharing a view :
a. Share View with a Jira User Group (share with Internal stakeholders-Jira User Group)
b. Share View with a Jira Customer Organization (share with External stakeholders -Jira customers)-The View shared would be Published in the Jira ServiceDesk Customer Portal.
c. Export View as a PDF report UPCOMING-RELEASE roadmap
4. Publish & Analyse Reports in Jira ServiceDesk Customer Portal
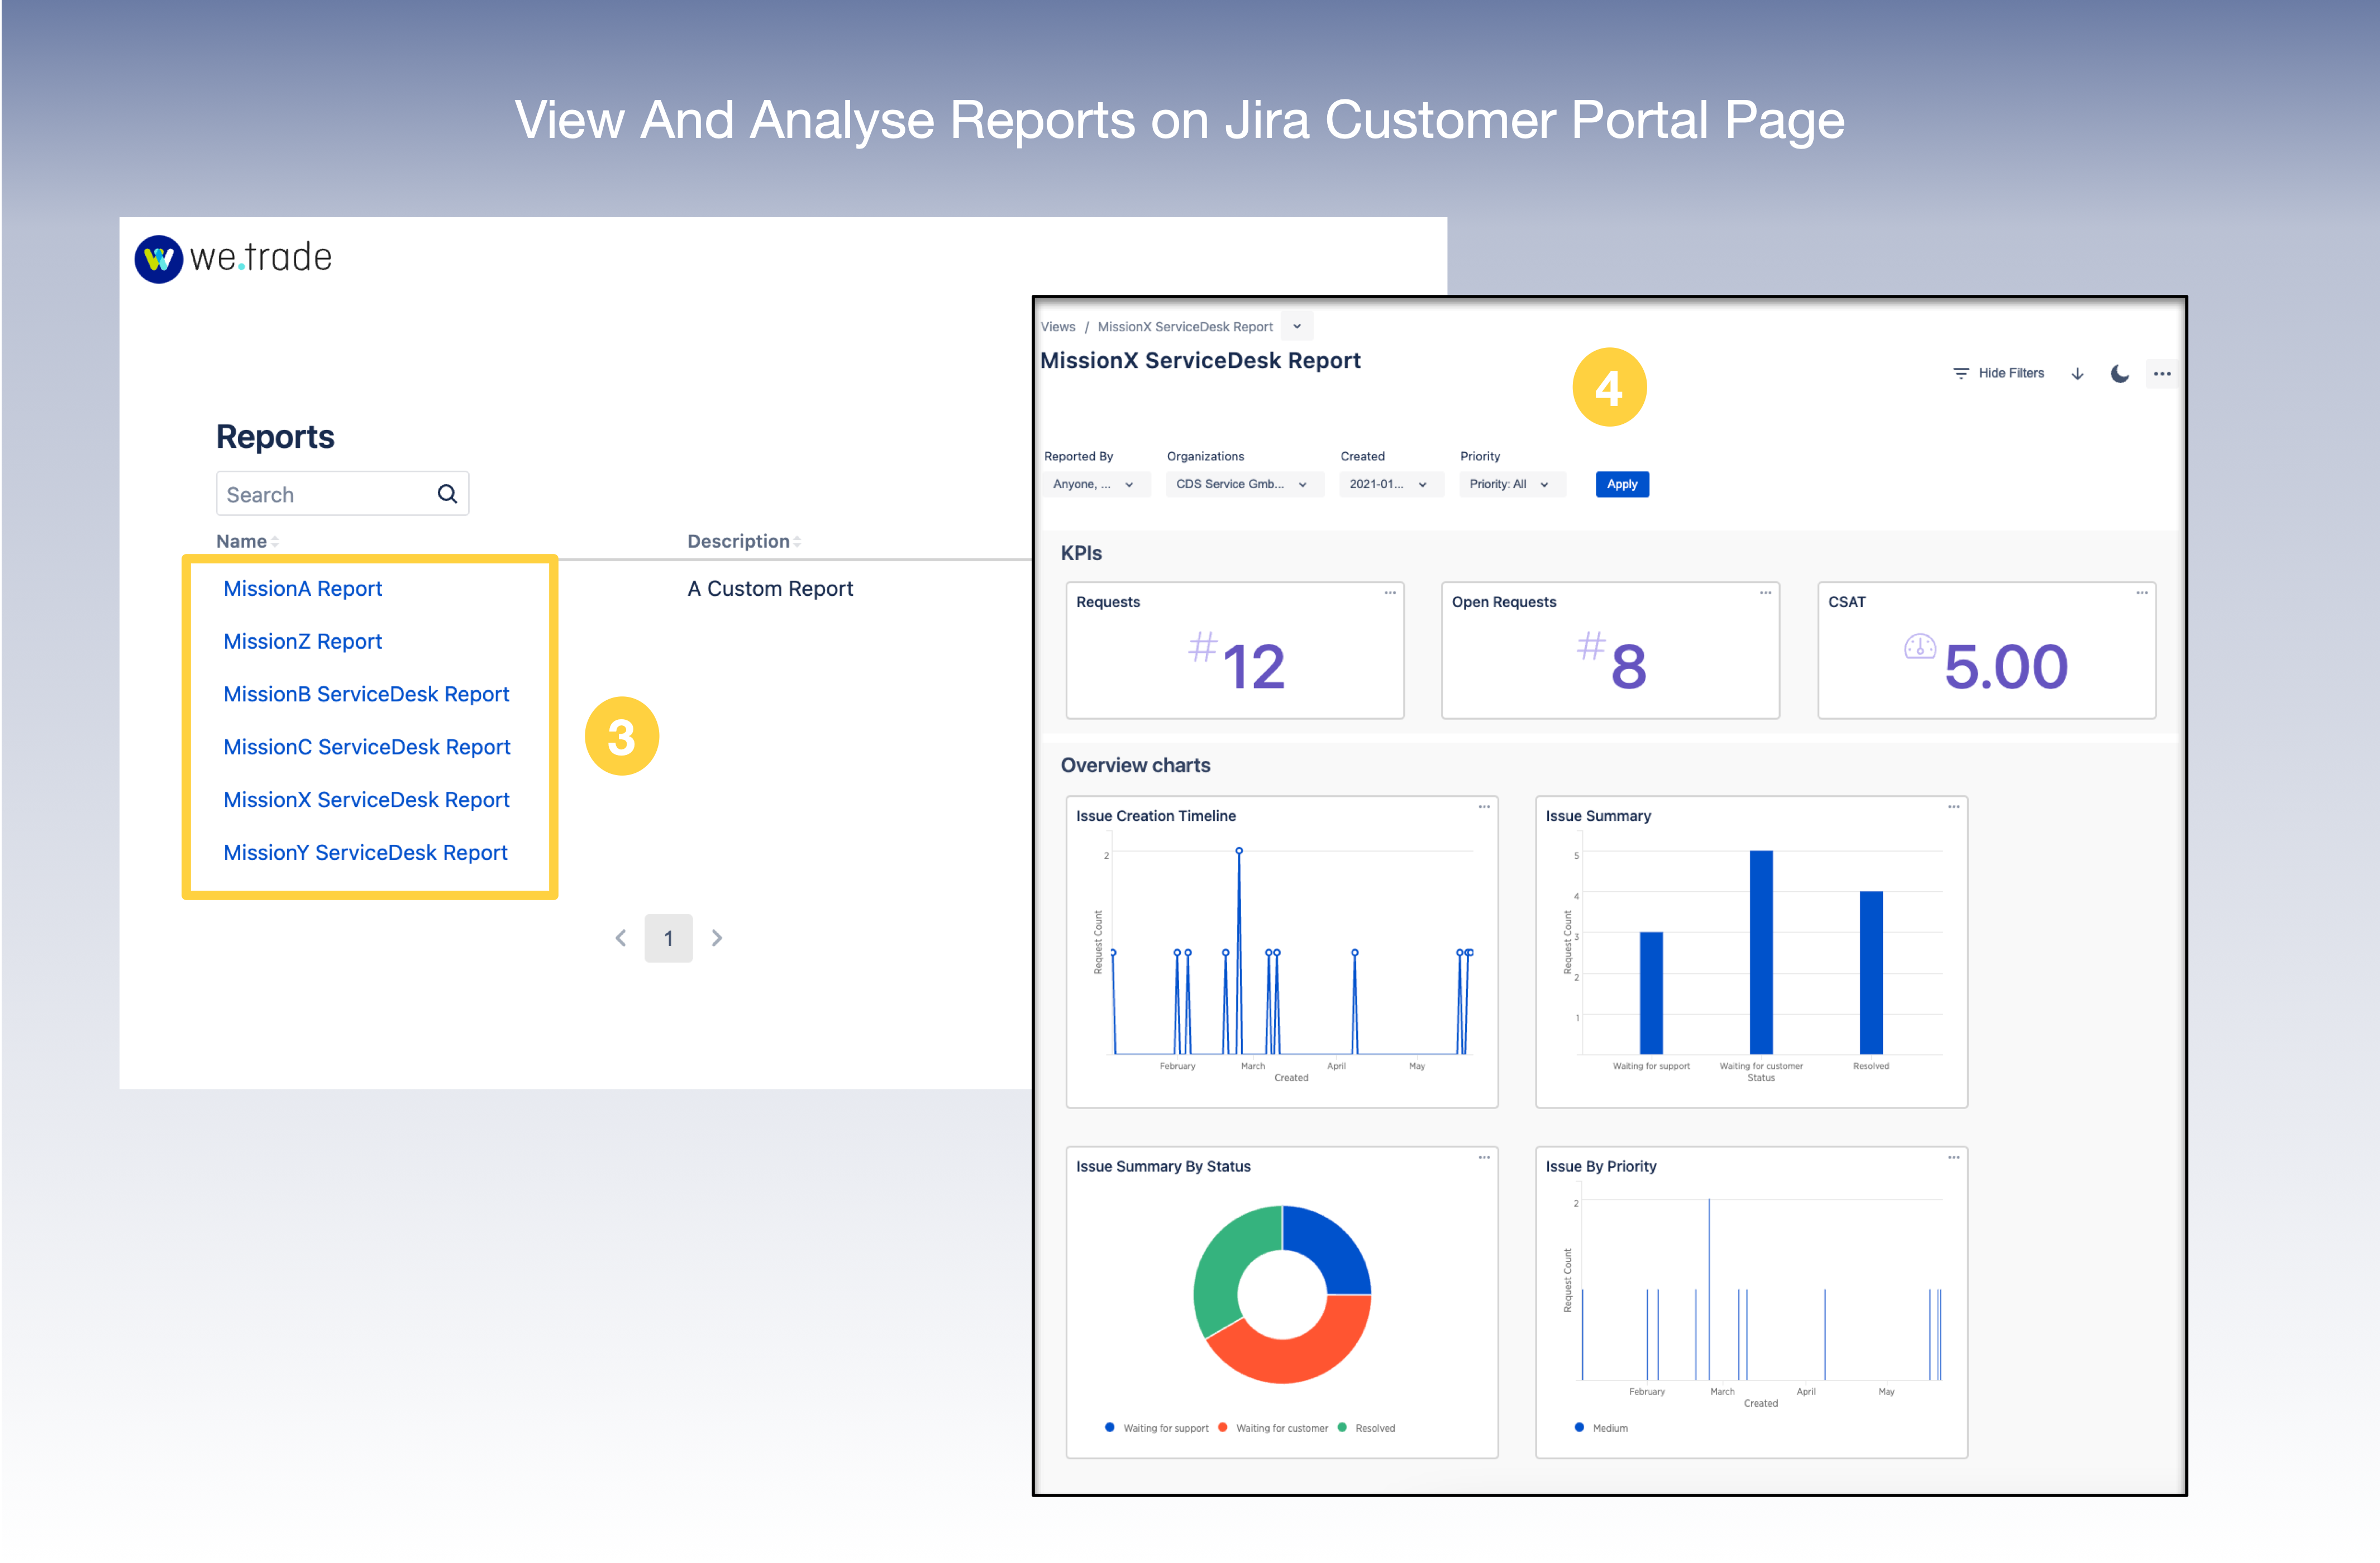
VIEW26 Reports for Jira allows you share reports with external customers via the JIRA ServiceDesk Customer Portal
A Charts & Reports option will become available in the Jira Customer Portal when you have installed the VIEW26 Reports for Jira App.
1. Click on view26 Reports for Jira under the User Profile in Customer portal
2. This will open the List of all the Views which are shared with the Customer’s Organization
3. Click on any of the Views to Open up the Report
4. You can analyse and explore the Report further using all the different filters available

