
The Storyboard AI frame editor is where you build a video from a Jira work item, one frame at a time. To open it, click Open editor in the Storyboard AI panel on the work item. The editor has two main areas:
-
Left sidebar — icons for Template, Audio & Captions and Cover Settings. Click one to open that panel.
-
Main area — your frames, shown as cards you can edit directly.
Working with a frame
-
Upload media — click Add Frames to upload images or videos as frames. Click an existing thumbnail to see it full-size. Uploads under roughly 4 MB are also copied into the work item's Attachments section automatically, so the asset is visible on the ticket. Larger files — most video clips, stay in the storyboard only; the frame and the render are unaffected either way.
-
Reusing files already on the ticket — the editor does not browse the work item's existing attachments; upload the file to add it as a frame. To build frames from files already attached, ask the Storyboard AI agent instead (see Rovo Agent).
-
Frame name — click to edit. Saves as you type.
-
Script — write the narration for this frame. Saves as you type.
-
Duration — for image frames without narration, set how long the frame stays on screen. For video frames, the clip's own length is used by default.
-
Mute video — mute or unmute a video's audio while keeping your narration.
-
Trim or split a video — click Edit (the scissors icon) on a video frame to open Split & Trim Video. Set where the clip starts and ends, or cut it into several frames. See Trim and split a video clip.
-
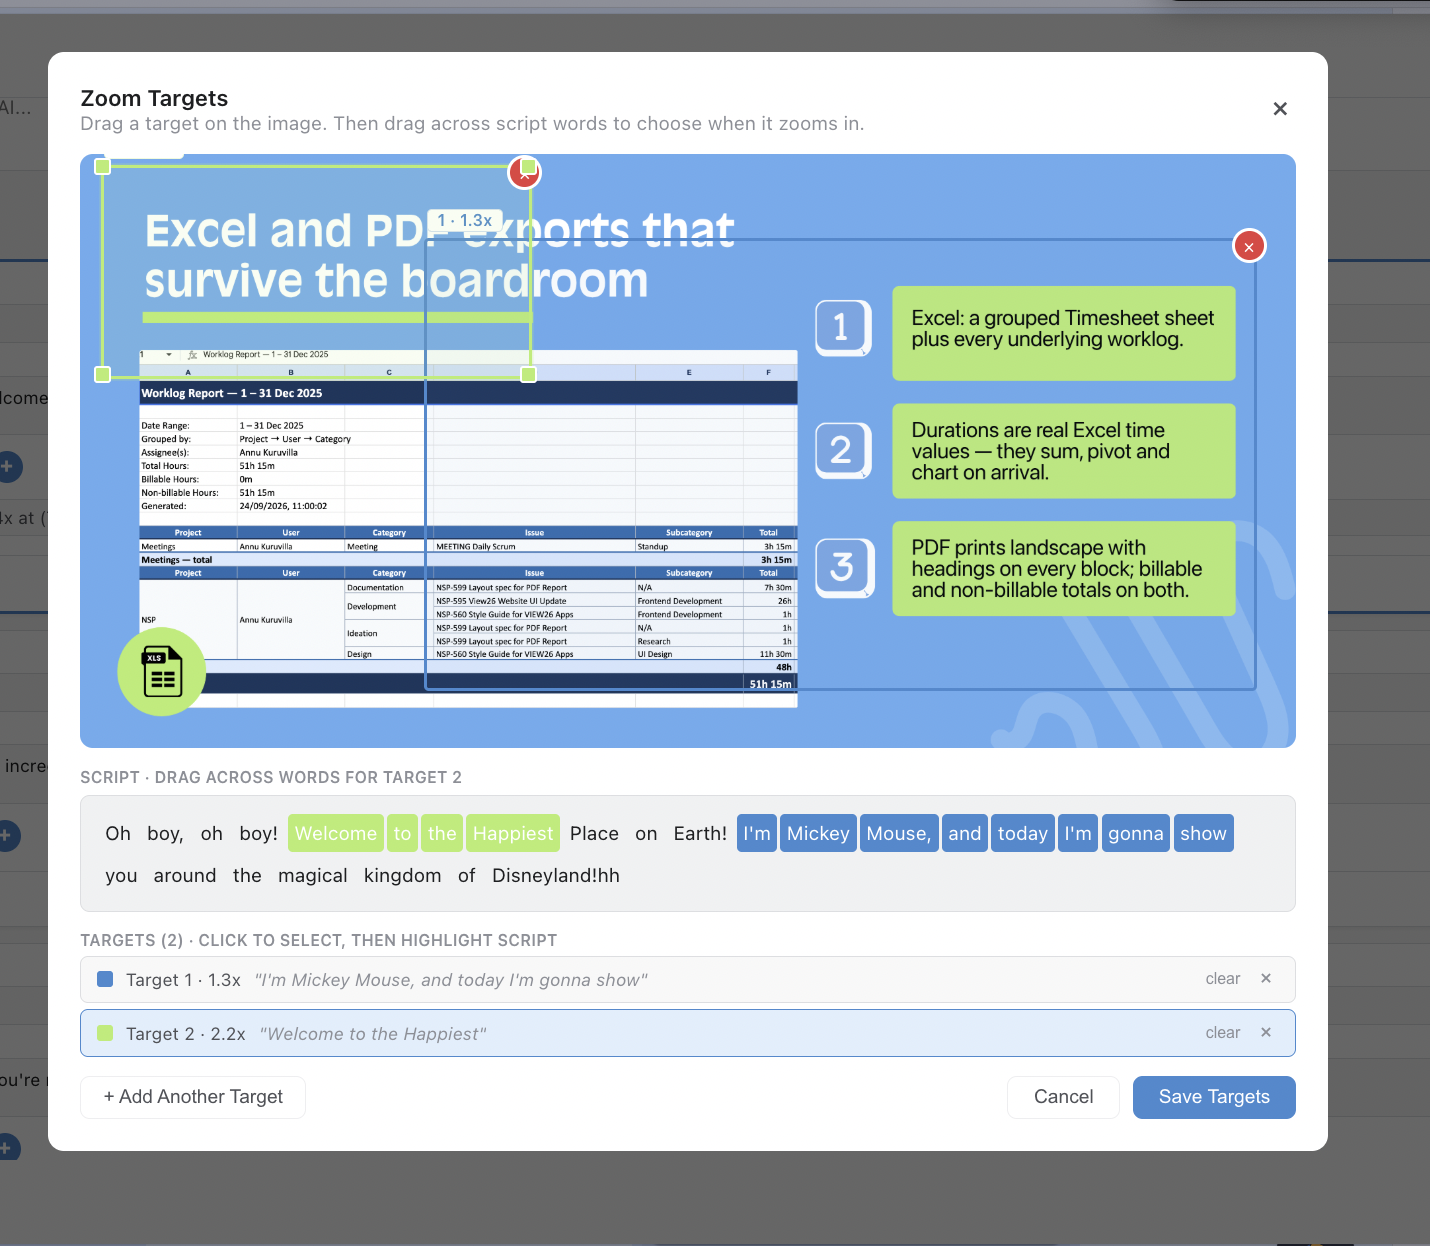
Zoom targets (image frames) — draw rectangles on an image to tell the camera where to zoom. Link each zoom to a span of words in your script so the zoom happens exactly when that phrase is spoken.
-
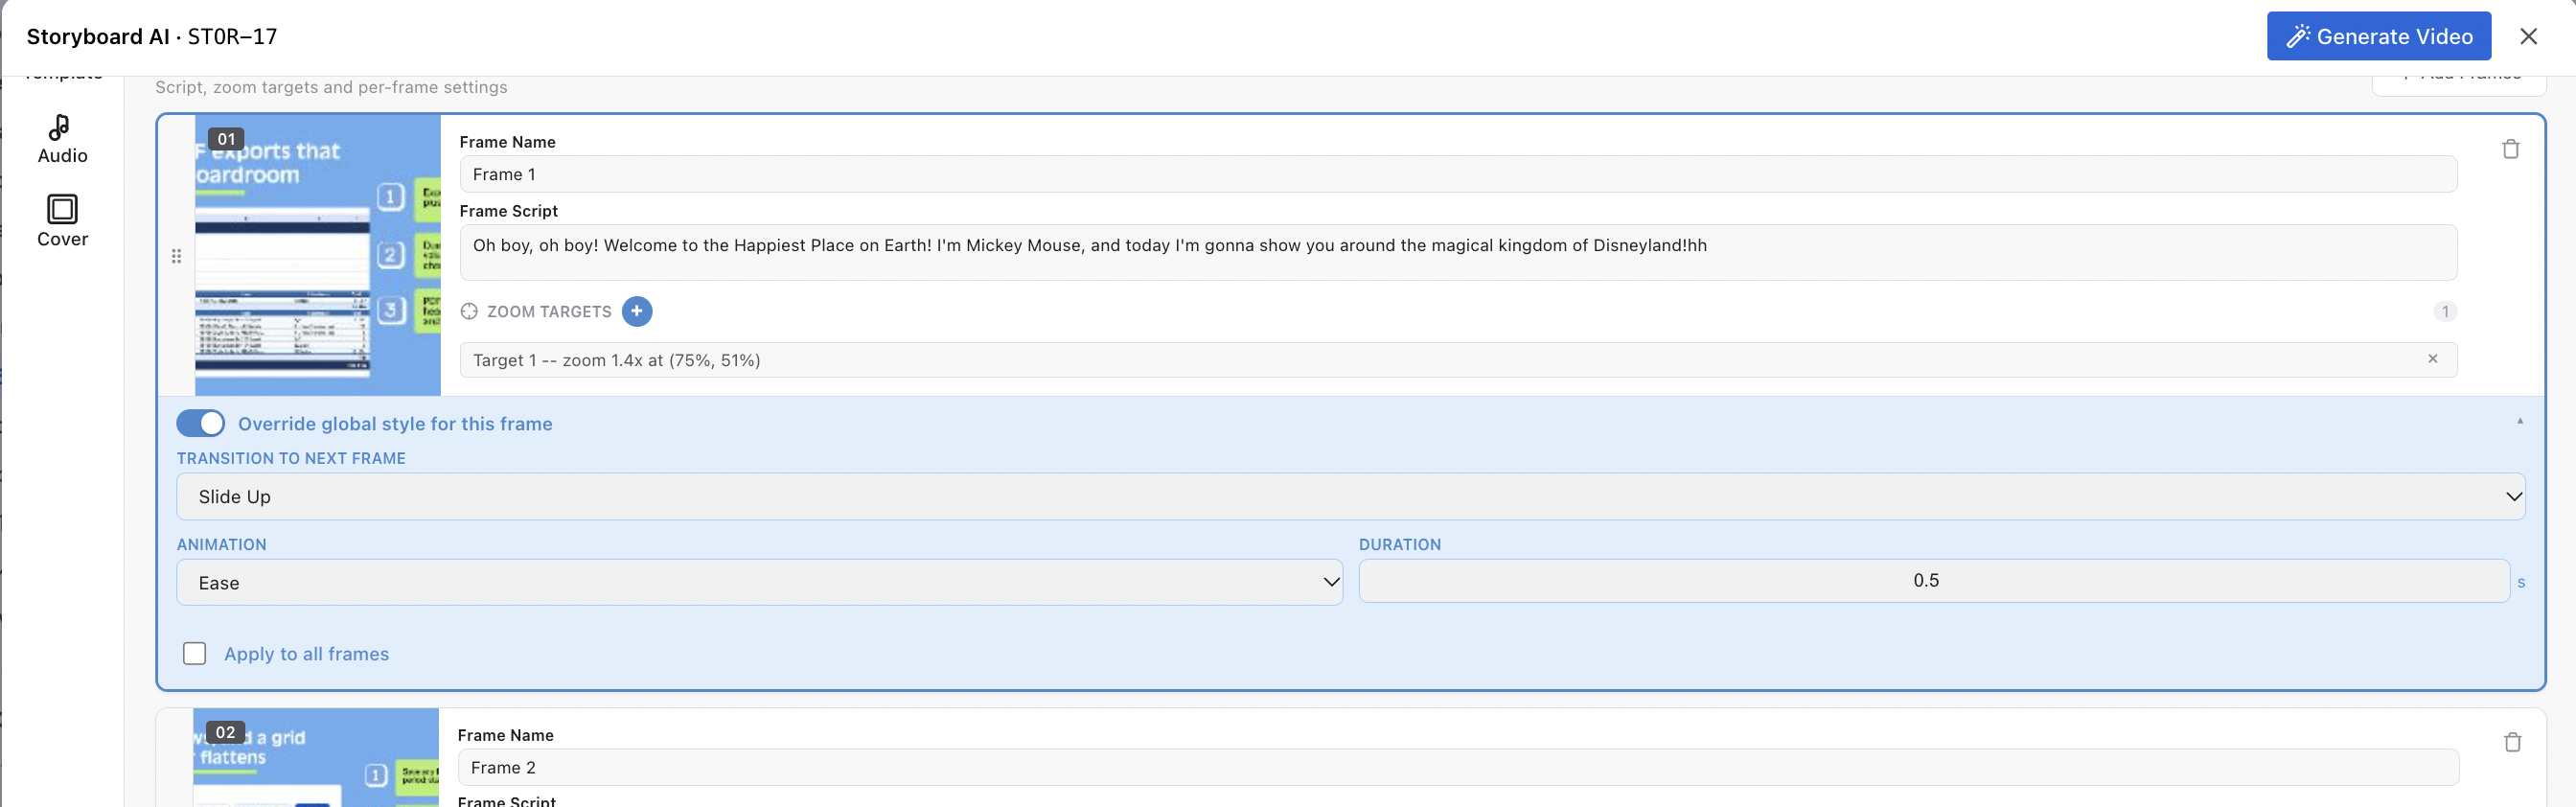
Transition — choose how this frame flows into the next (fade, slide, etc.). You can apply your choice to all frames in one click.
-
Reorder — drag a frame up or down to change its position.
-
Delete — remove the frame.
Screen recordings larger than 1920×1080 are resized automatically when you add them in the editor. On an older browser that can't resize them, resize the clip yourself before uploading, or the render may fail.